A Wall-Mounted Homelab: The How and the Why
As promised in my last post, here is a full writeup about my server setup, or as people in those circles call it, a "homelab".
I got into servers and networking roughly two years ago as part of my solarhosting project, and have over time expanded it to what is now this pretty nifty wall-mounted server setup:
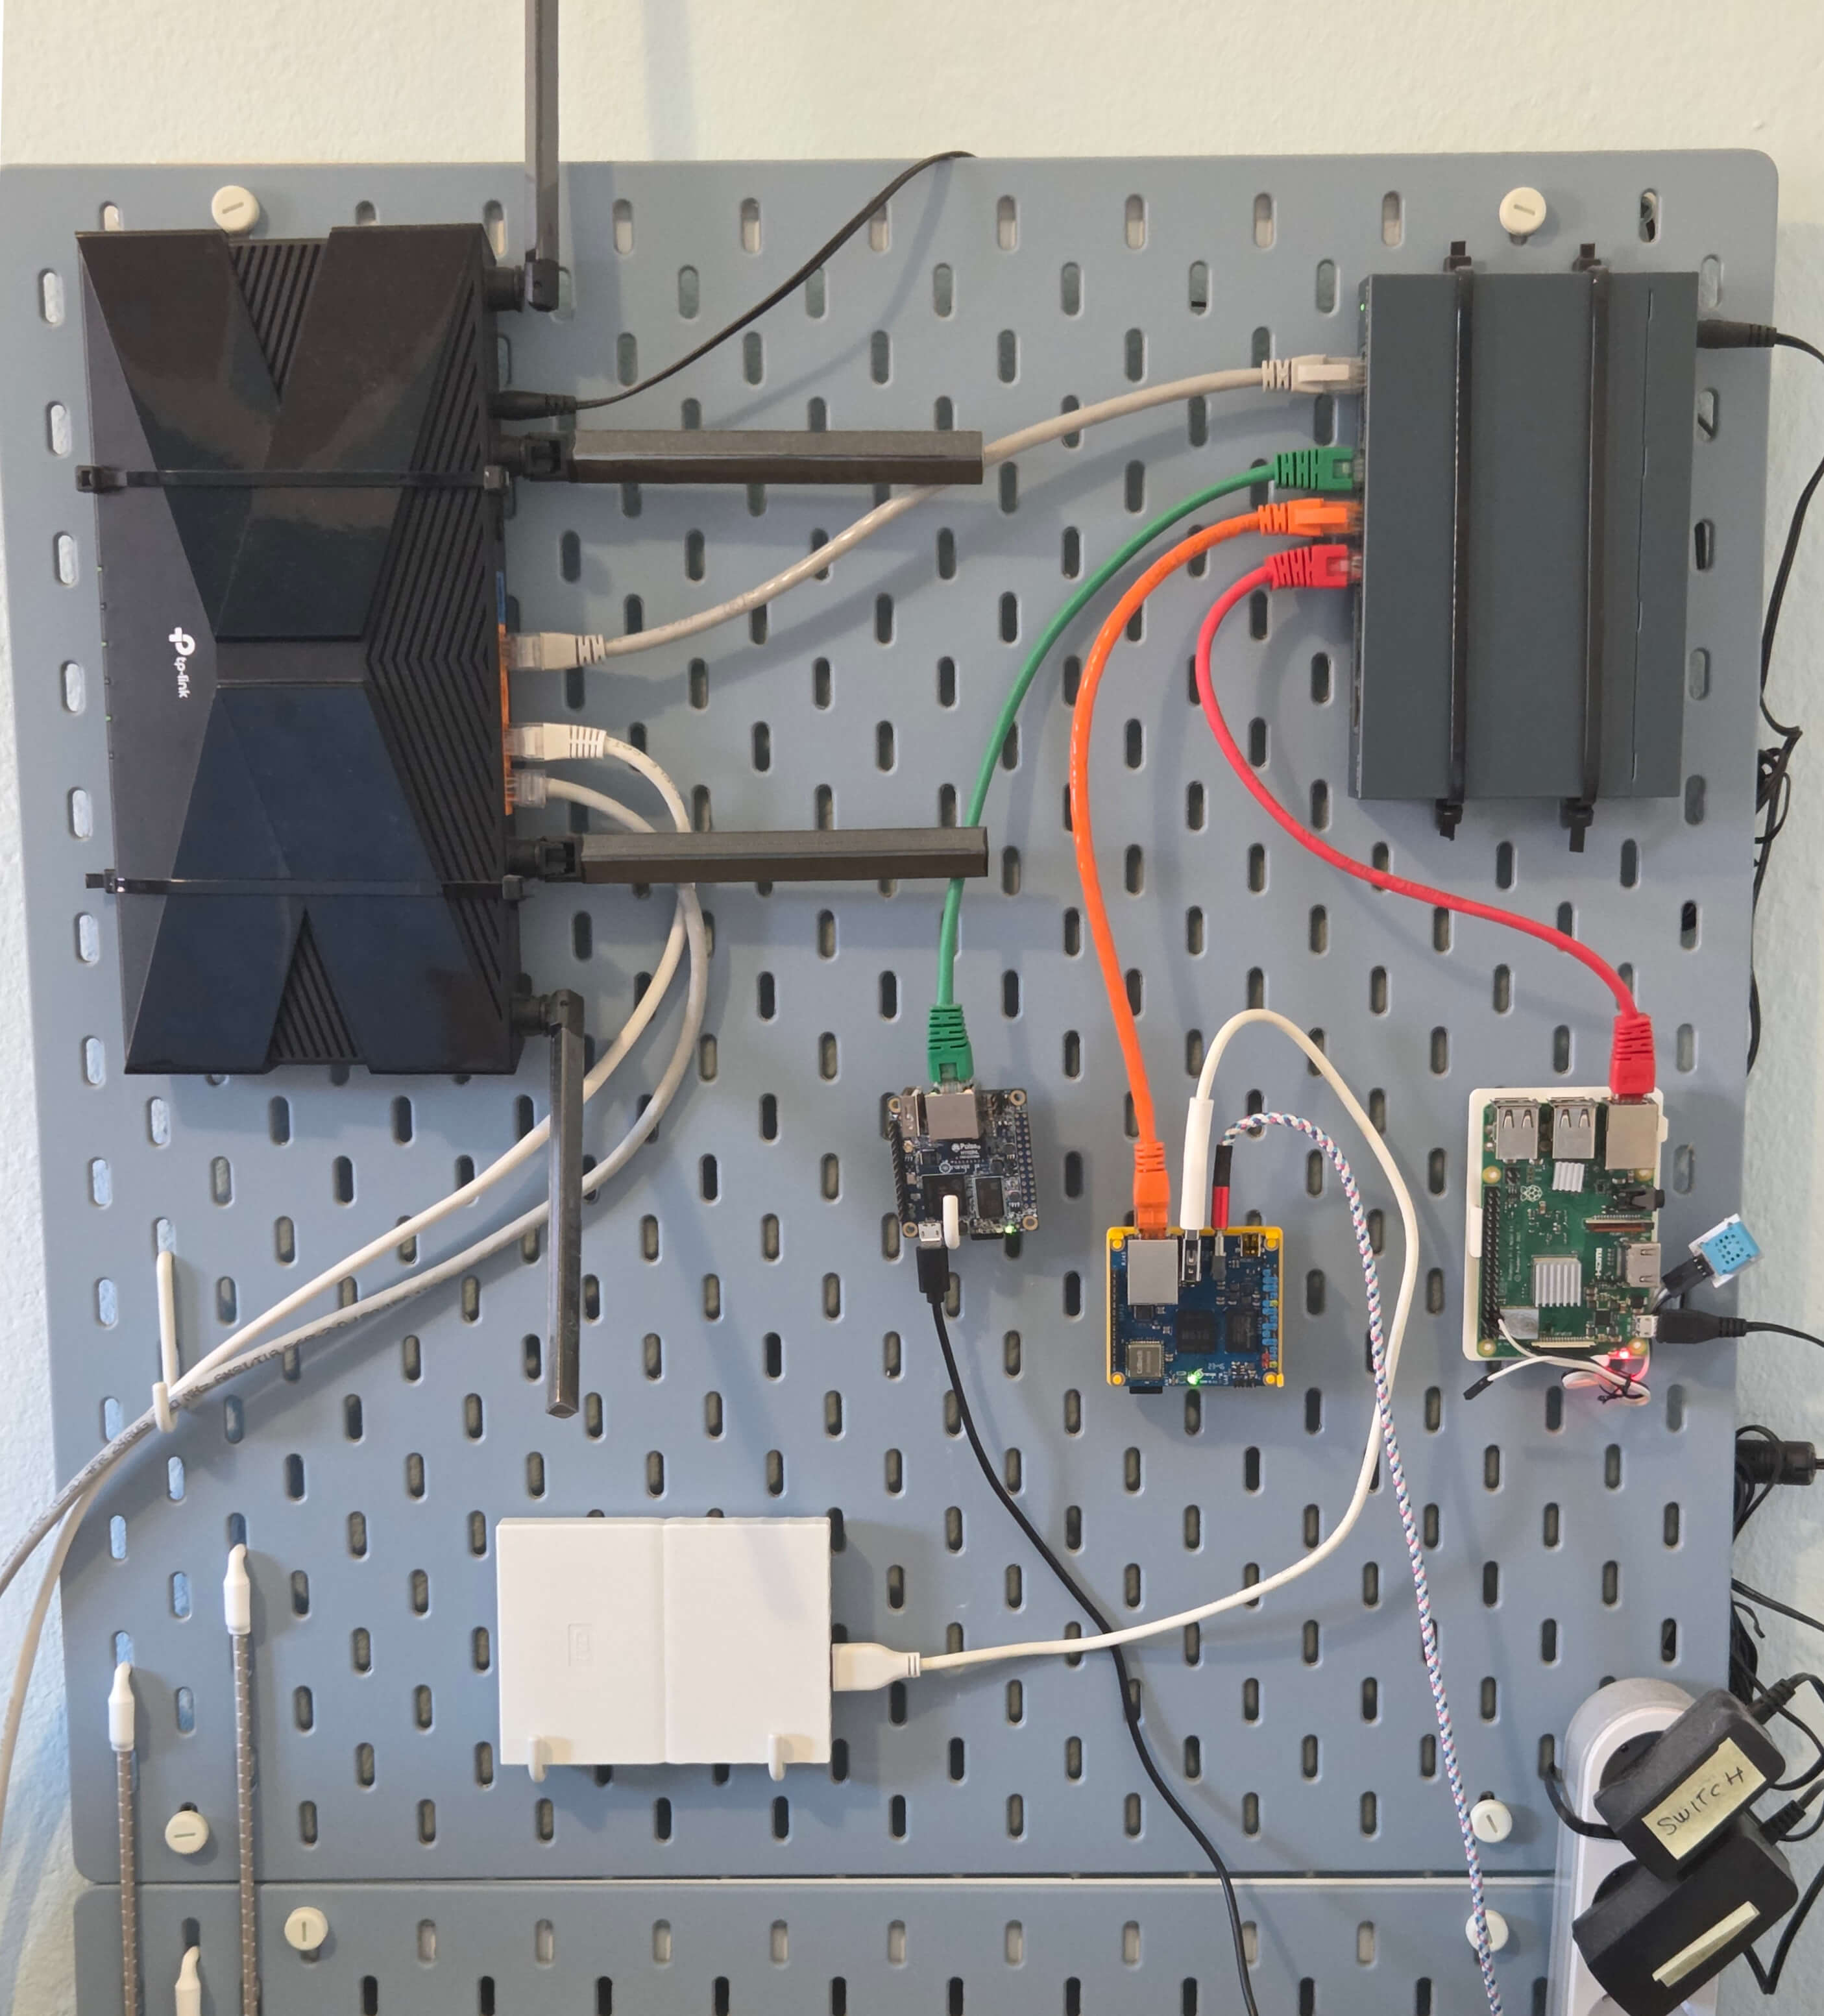
So what does this contraption do? It's my playground for all things servers, but at the time, it's mostly just hosting this blog. It's load balancing between three separate servers, each hosting a differently-colored version of it (right now you're on the blue one). It's all purposefully done using barebones tech, both in hardware and software, so there's no Kubernetes, Proxmox or Cloudflare tunnels here, and instead it's all built using baser technologies, so it works like something people might've built in 2007 or so.
I've had my ups and downs tinkering with this setup and have learned a lot, but now feel like I've exhausted the best ideas I had for it, so I wanted to churn out a final writeup so I can close this story and move back to other hobbies. This will be a long and a winding one, in parts a tutorial, in parts a story, and in parts a philosophical essay on technology. Let's begin.
Router - The Entry Point
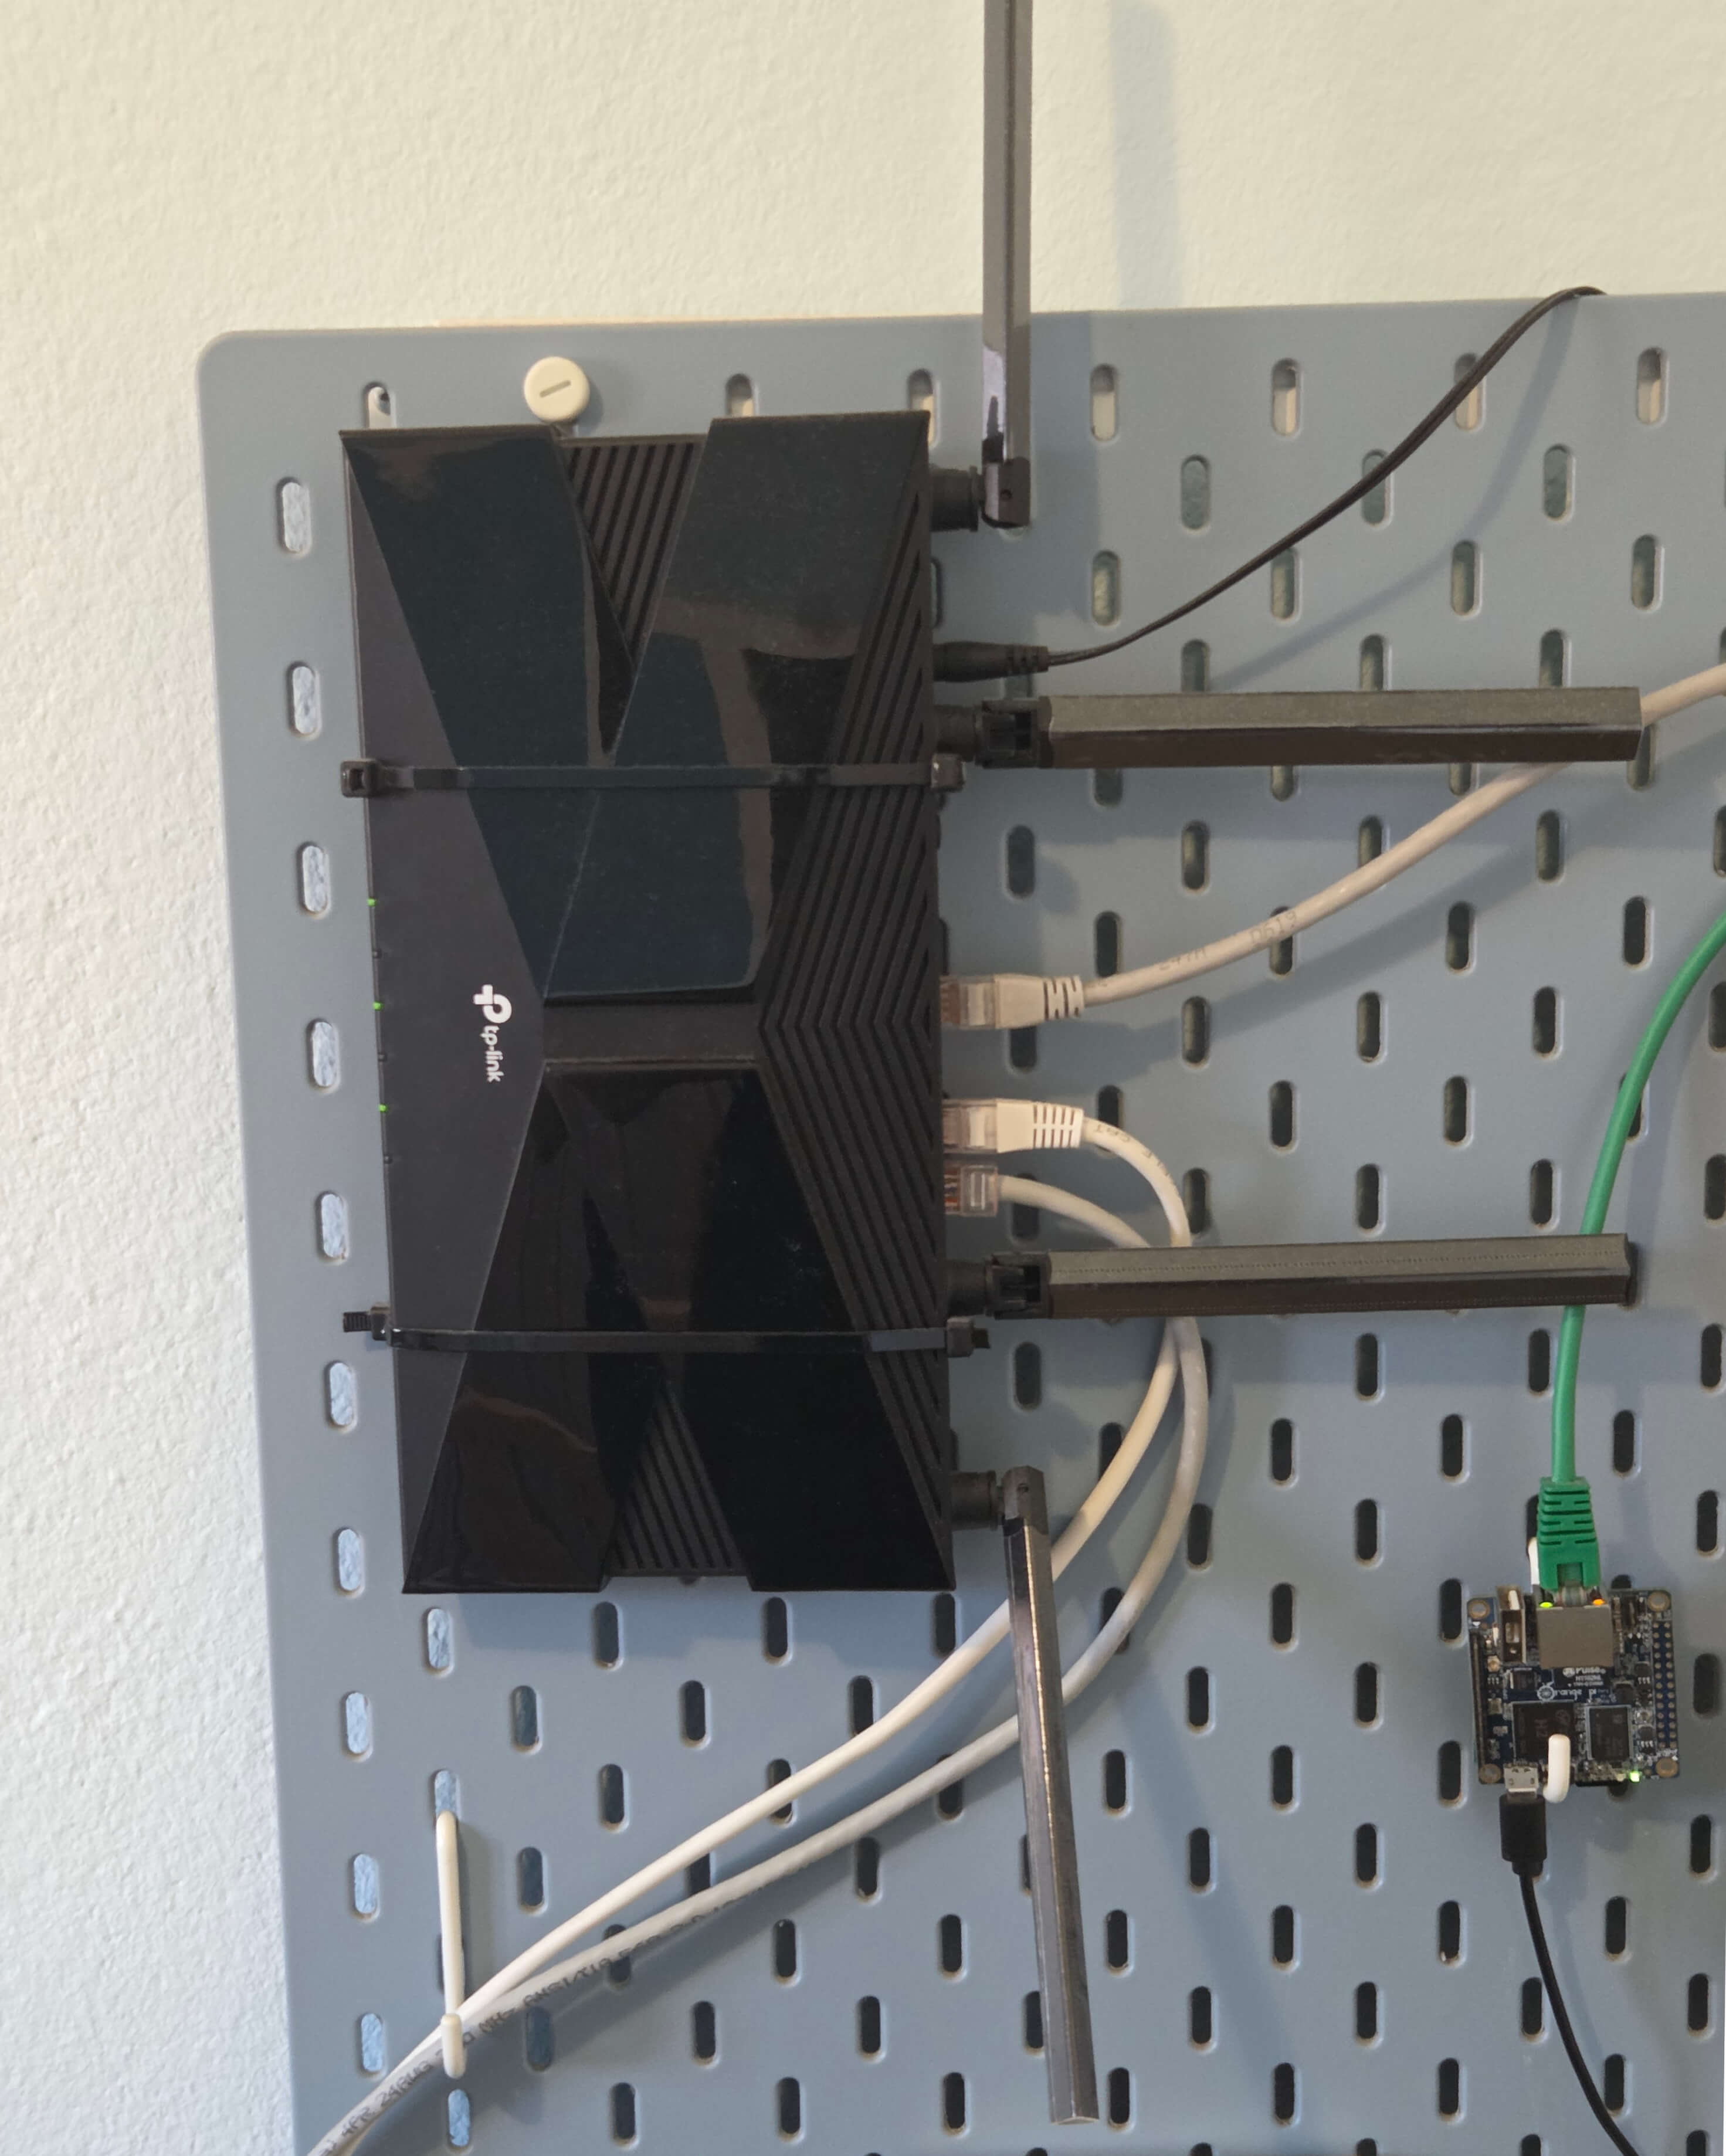
The starting point of this installation is the TP-Link router on the top-left corner of the board.
This isn't actually my main, ISP-provided router - that one is situated in a pretty awkward spot across the house. Because of its placement, the Wi-Fi coverage was not ideal across the house. Most unfortunately, my office, the room where I needed internet the most, was on the completely opposite end of it and had the worst coverage. This needed to be fixed.
I tried cheaper options. First with a Wi-Fi repeater - it did increase the range, but it had lowered the overall speed. Then I tried powerline connectors, which somehow had even worse speed, most likely due to old and shoddy electrical installations in my house.
The only real solution was to install a very long ethernet cable from the router to the other room, and plug in additional router there.
I'm not an expert on routers, and I don't particularly want to become one, so I picked something that was a best buy, not too cheap, not too expensive. Settled up on TP-Link Archer AX10 (56€) which satisfied my modest demands - 5 GHz Wi-Fi and gigabit LAN ports.
Connecting additional router to the network, in theory, should be very simple. If you connect it via cable to any other device already on the network, it will know how to traverse your network to find a route out towards the internet. I guess that is what makes it a router. In any case, just doing that should be enough that the router will become operational and you should be able to connect to the internet via its Wi-Fi access point.
But keep a note that I said: in theory. In practice, it gets a little bit more complicated. Let's talk about Dynamic Host Configuration Protocol, also known as DHCP.
Each router has a DHCP server running as part of it. It's basically the part of the router that configures the clients to be able to connect to it. One example is that it assigns IP addresses to the devices and tells them which DNS servers to use.
Your ISP-provided router definitely has DHCP running on it. And if you connect another router with DHCP on the same network, all kinds of undefined behaviour happens, because you'll have two devices dealing out IP addresses on the same network. In my experience, the consequences of this turned out very chaotic and unpredictable - like bringing the entire home internet connection down or making even the main router inaccessible through the web interface. Probably all depending on which of the two routers booted first and started dealing IP addresses to one other. Or who knows what exactly - it was very hard to debug.
For this to work, you need to disable DHCP server on the secondary router. But there is a catch 22 here - to connect the router to the network, you need to disable its DHCP, but to disable DHCP, you need to connect the router to the network. I went back and forth with this until I figured I was best off connecting it to a computer that's not connected to the network, and configuring it there. Only then it's safe to plug it to the network fully.
Apart from DHCP, there's another gotcha which somehow bypasses it. Most routers want to set their own IP address to 192.168.1.1 or something similar. If you already have a router at that address, and the second one wants it as well, that's also gonna clash in a myriad of unpredictable ways.
You might think it should be enough to set your main router to assign the second one a fixed address like 192.168.1.2. Well, yes, but actually no, because still the secondary router has a setting for its own address, and it really wants the 192.168.1.1 one. It will still clash, the IP address might be good but you won't be able to access its web UI because the router's web interface still expects it to be on 192.168.1.1, where it is not.
So you need to change that IP address on a secondary router first, and then also make sure primary router assigns the same address to it, too. Then, the IP addresses will be fine and both routers' UIs should be accessible from the web, and everything should be working seamlessly.
It's only at the end of this process that I realized that I bought this thing called "router" and turned its "routing" option off, making it simply an "access point", and that there exist devices specifically for that purpose, called simply "access points". These should offer a much simpler setup (plug-n-play?) and avoid all this kerfuffle. But bear with me.
Two Routers, Two Access Points?
So with two routers, this means there are two Wi-Fi access points in the house. If you set the same name and password for both, they will be seen as a single access point with a huge range. Sounds good, right? Once again, yes, but actually no.
It's actually pretty bad because there is no handover mechanism from one access point to the other. Let's say you connect to access point A, which is close to you and you get a strong signal from it. But then you walk to other corner of the house, getting close to the access point B. No matter how close you get to B, however much the signal is better there, your phone will still cling to the point A that it originally connected to.
And this is - even expected? You likely don't want your devices to switch access points willy-nilly, because switching them is not instantaneous and your connection would drop for those few seconds that it takes to reconnect. This is not ideal at best, and catastrophic if you like to walk around the house during WiFi calls.
If you really wanted this, there are ways to force the handoff by setting the RSSI Threshold to a lower value, basically making sure the router drops the connection earlier. But as I was thinking about this, I only thought about potential dead zones it's gonna create, so I got convinced I'm better off simply not setting this up.
I ended up using different names for two access points, connecting each device to the one that's closest to it. It will be Good Enough (TM) for 98% of possible use cases.
Switch
Adding a secondary router solved my WiFi issues, but I still wanted to connect some devices with cable too. Here it turned out good that a picked a router instead of something simpler like an access point. This thing we call a router today is basically a modem, router and access point all in one box, but most importantly for me here, they're also network switches, too.
This one had 5 ports, so I assumed it should be enough for my PC and a few of these SBCs I'm hosting stuff from. But alas, it's not.
Firstly, one of the ports says WAN on it. From my college days I knew this means "wide area network", so me this vague term sounded like this is where you plug in the "uplink" connection, you know, the cable that brings the internet to the device, but it's not. It means this port behaves like it's bringing the internet to whatever it's connected to it. But more importantly, it creates a subnet for it.
The intended use case here is that you plug in a secondary router in there, and then you have completely separate virtual network inside of it. This is not what I needed, so I couldn't use this port.
This leaves us with four usable ports, but as uplink can't be connected to the WAN as I thought, it means that the uplink will take one of those LAN ports, which leaves us with just three ports to use. I plugged in my PC to one of them, and then realized I had just two ports that I needed to connect three SBCs to.
So I got a dedicated switch too. Again, I wanted something budget but reputable, so I picked TP-Link TL-SG108. For 25€ you get eight ports, which should be more than enough.
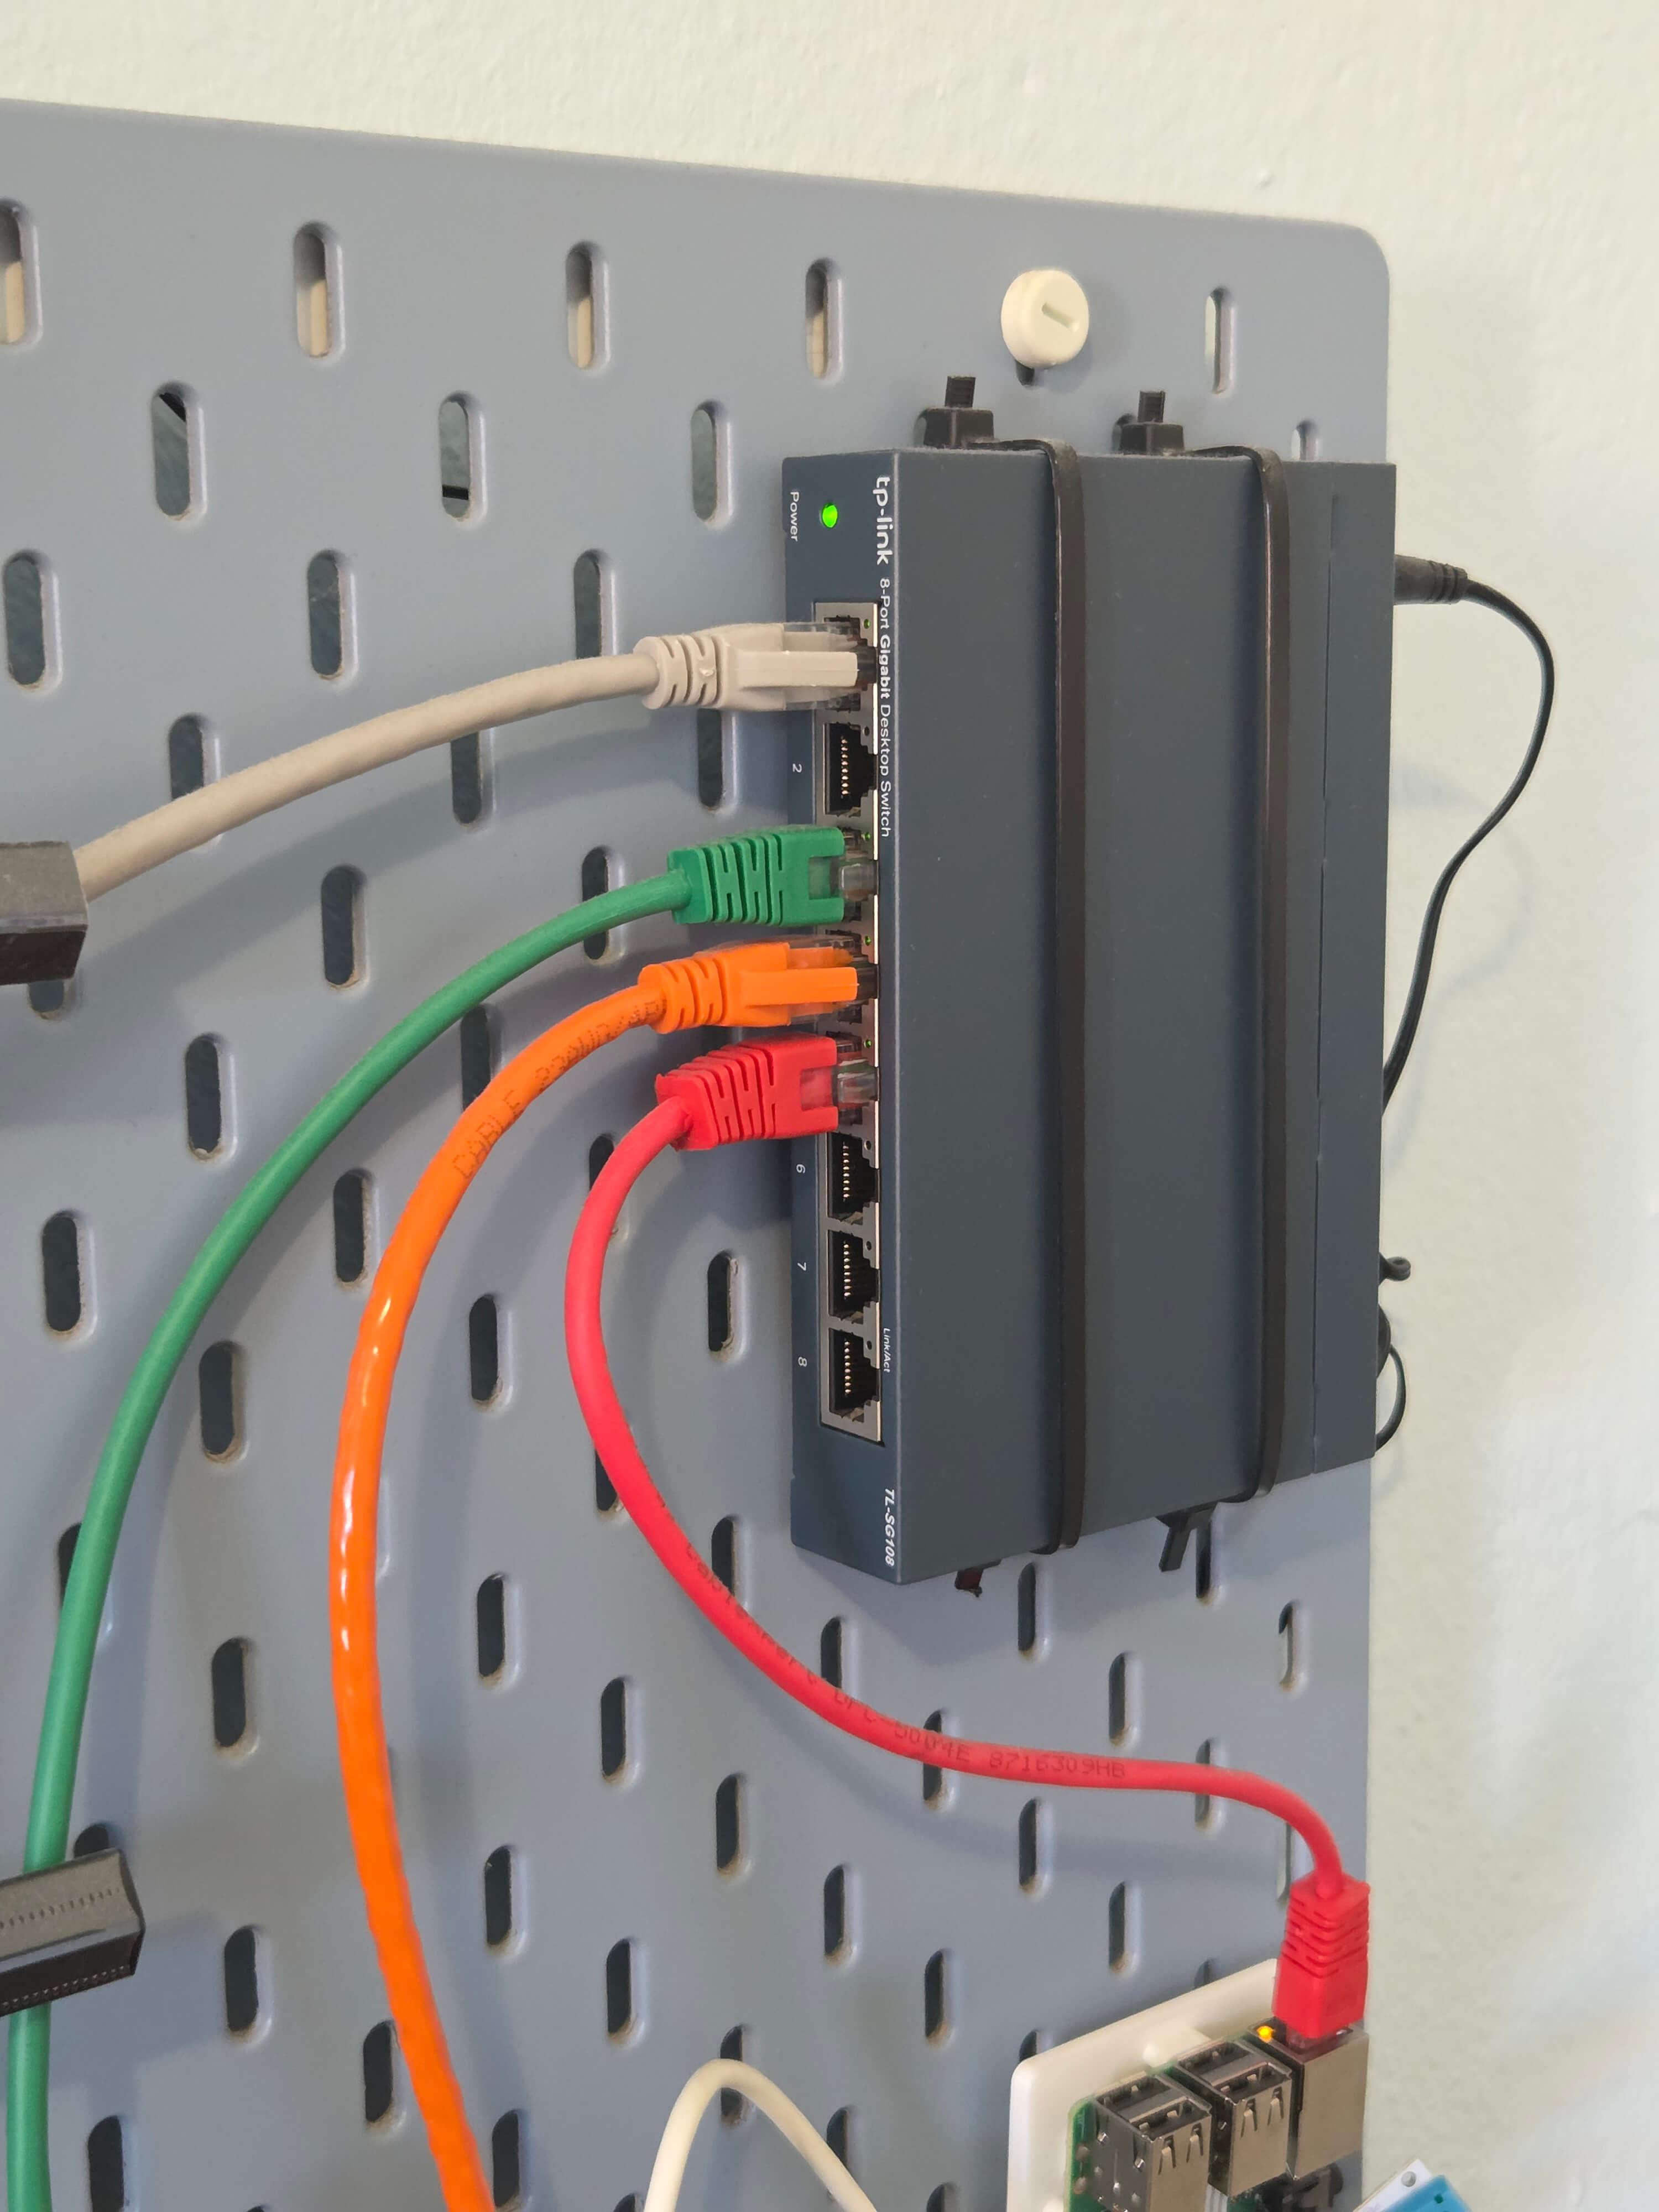
One other important requirement for me, which luckily is by default in this price range, is that it had to be an unmanaged switch, meaning no clicking through some UI to set it up. And indeed, the experience here was plug and play - you just wire everything you want to it and that's it. You don't even need to think whether the uplink connection should first go to the router and then to switch, or the opposite way. Once the cables are connected, I guess the routers route everything exactly where it needs to be.
In the future, I could get a managed switch to be able to set more detailed (and safer?) access rules. Or even a hardware firewall for that same purpose. But for now, this simple setup is good enough.
Raspberry Pi - Pi-hole DNS
Next up, we have a Raspberry Pi 3B+. This is a bit older device that has been sitting in my drawer for quite a few years now, and it's only recently I've decided to put it to use.
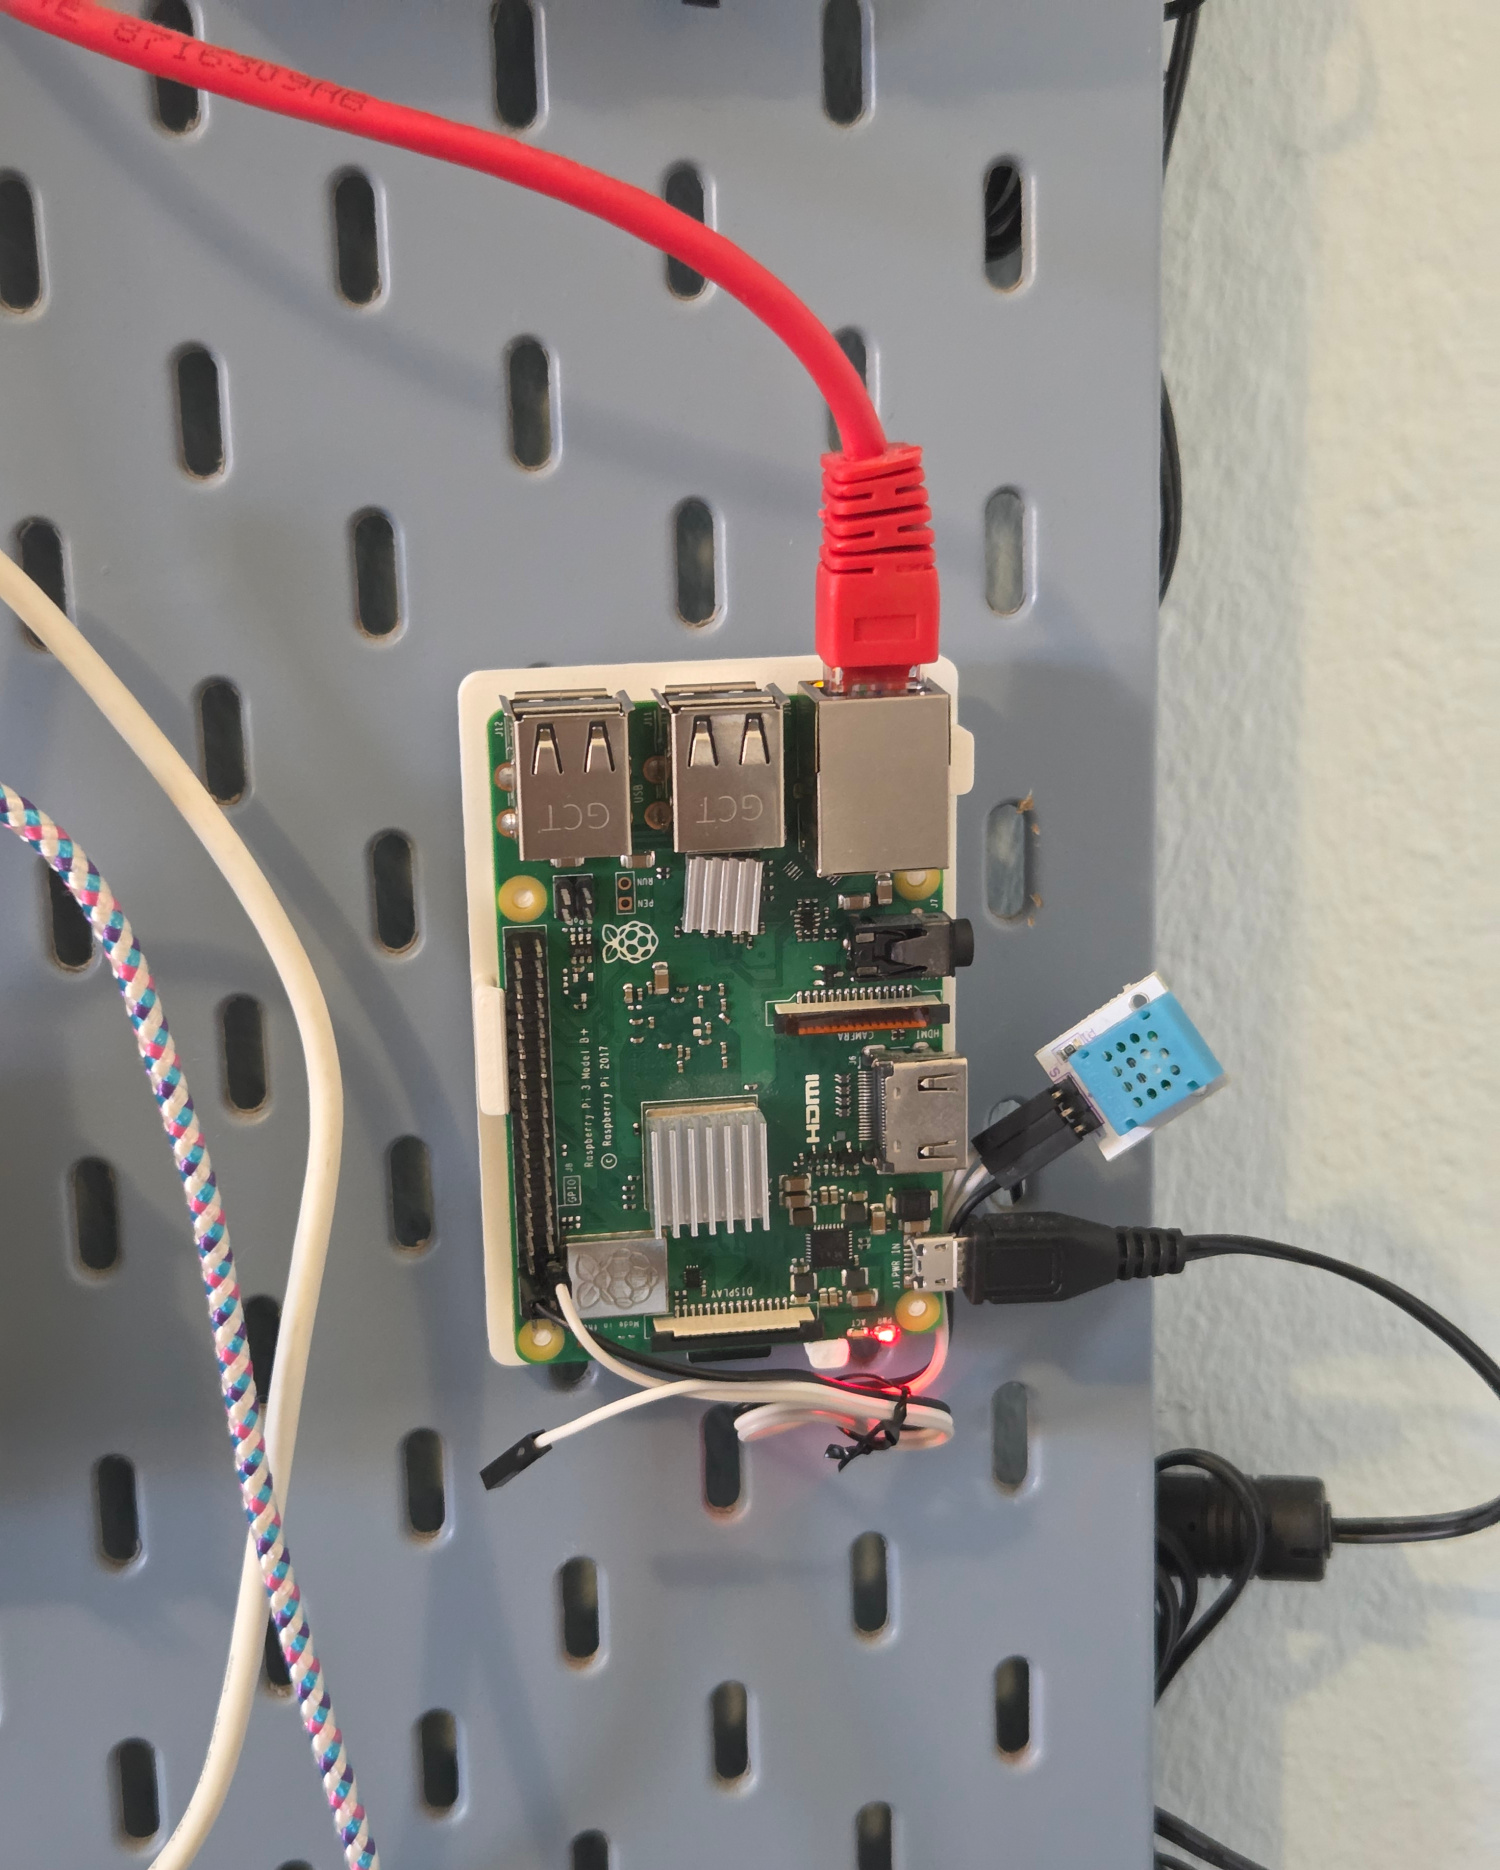
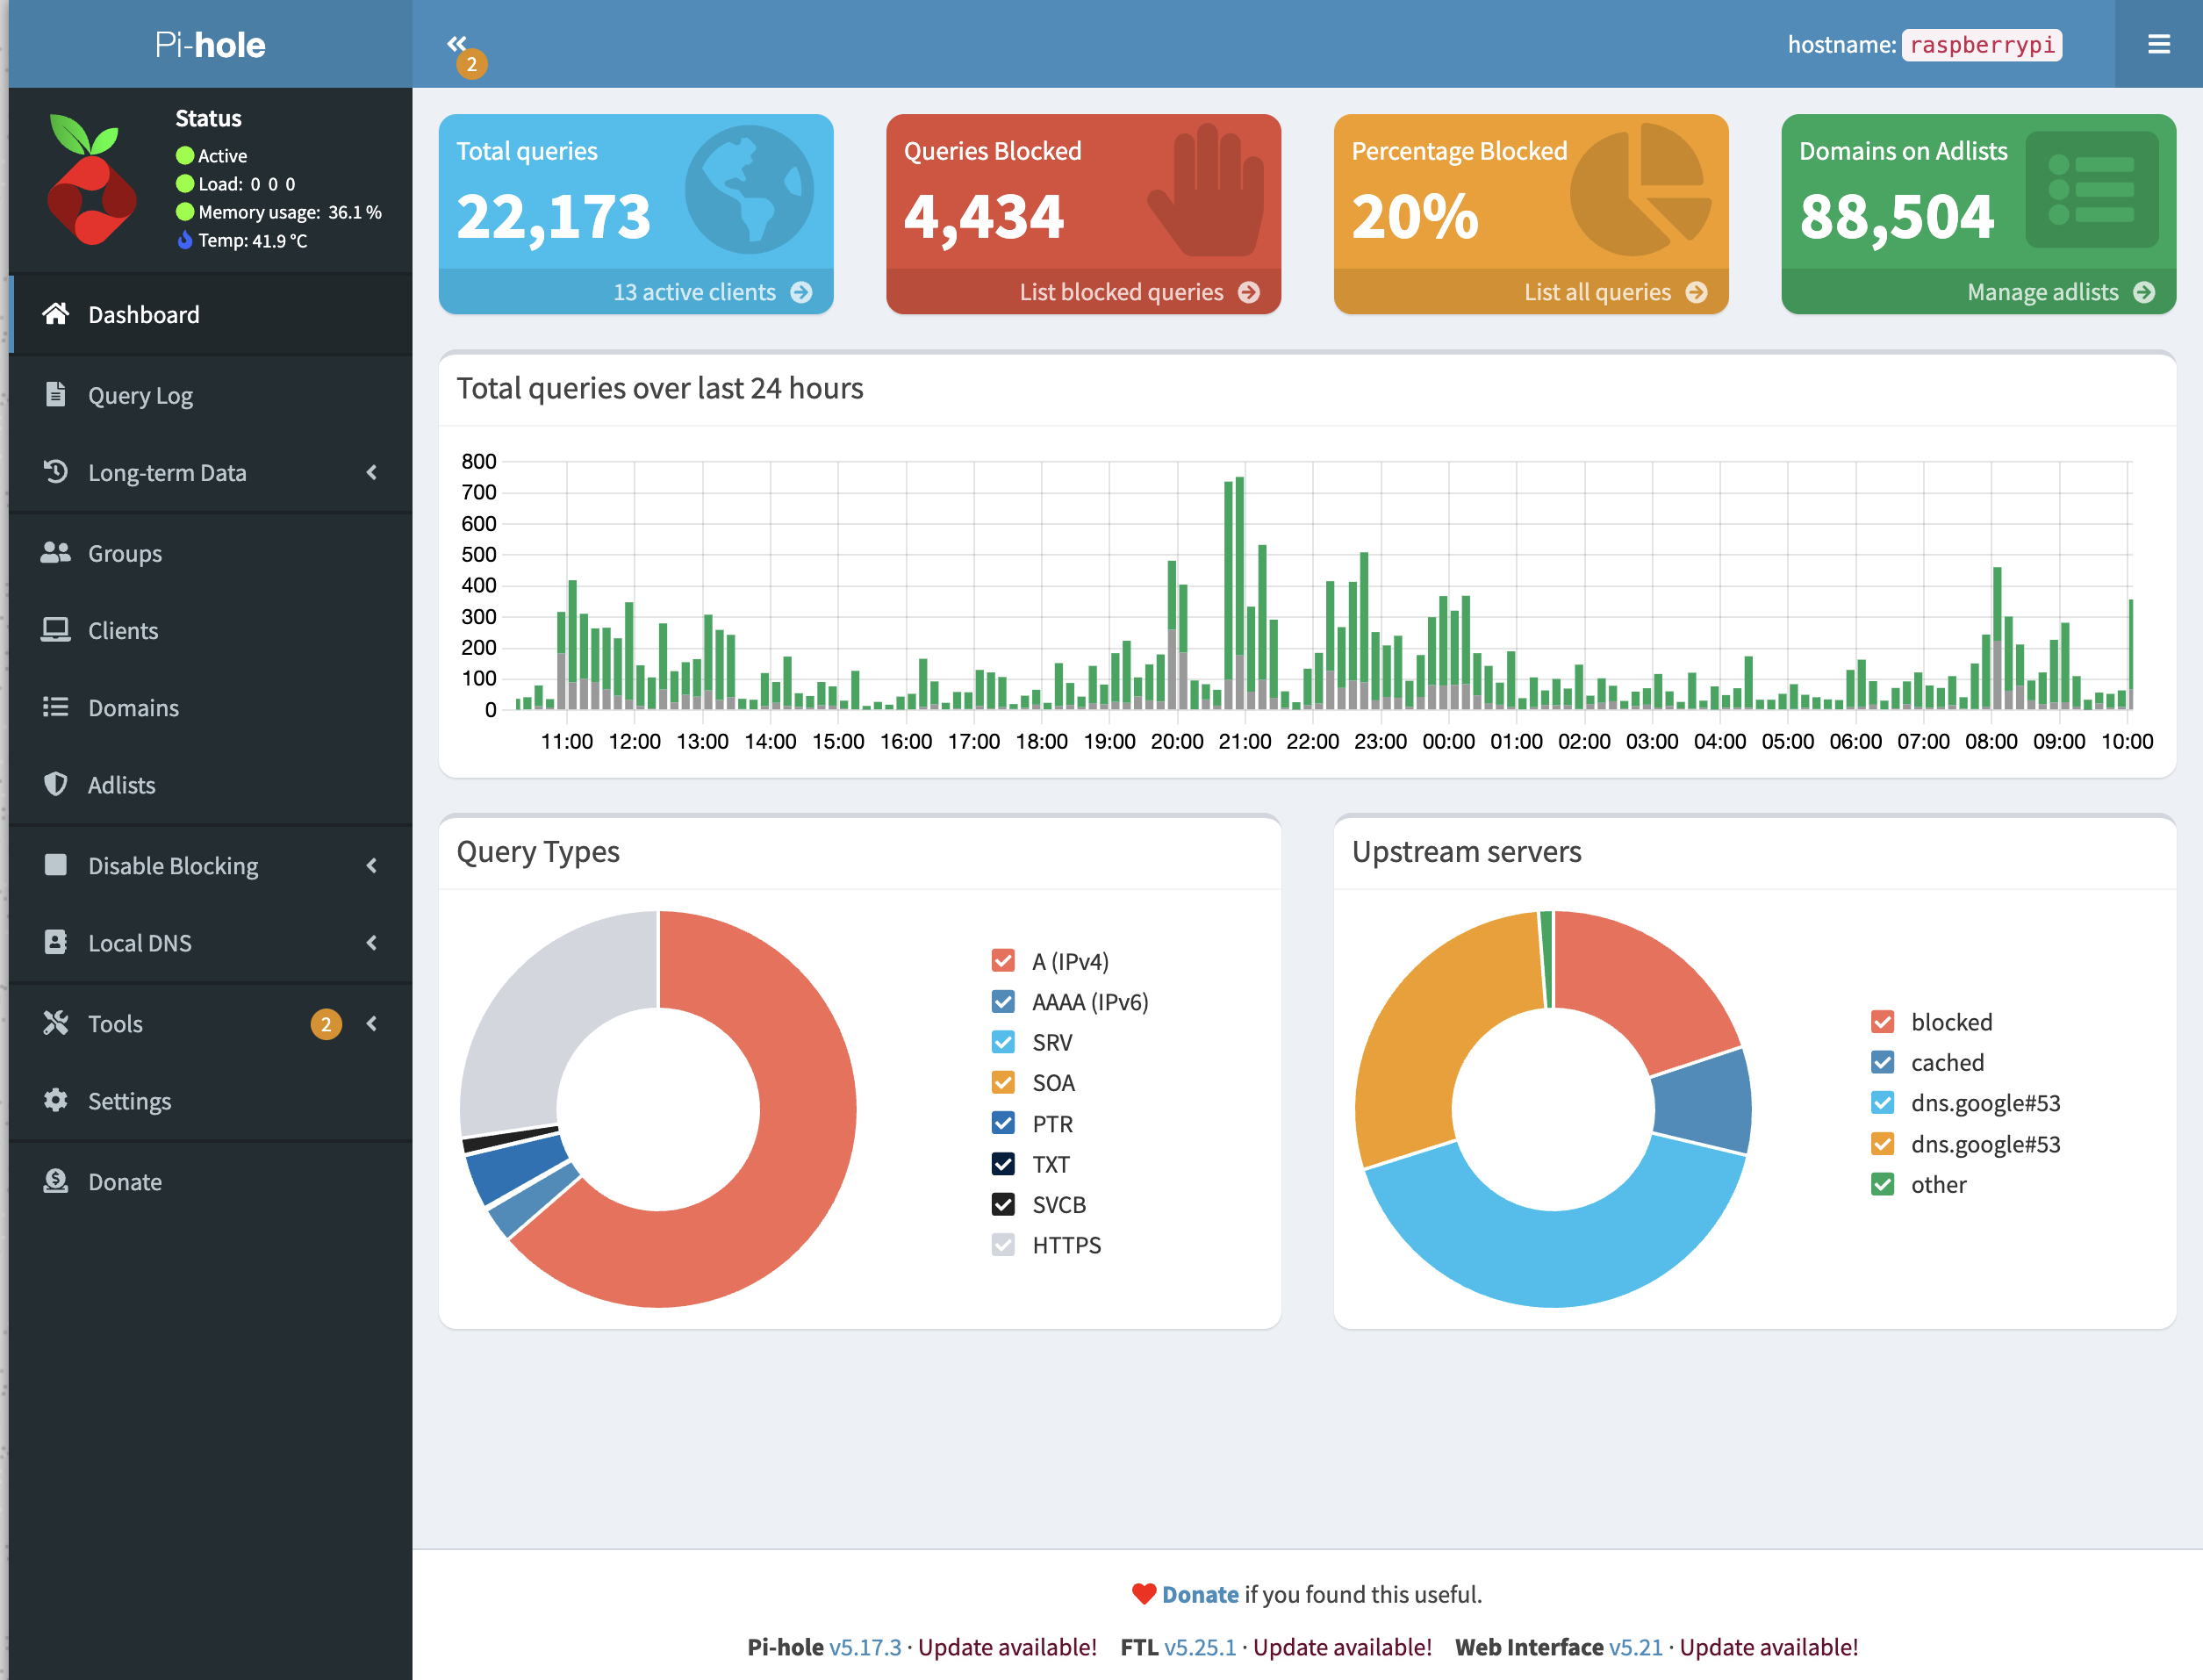
Its primary purpose now is running a network-wide ad-blocker using Pi-hole. And let me tell you, Pi-hole is amazing. Easy to install, resource usage is next-to-nothing, and the UI is light-years ahead of the regular router UIs in how logical and fast it is.
It basically serves as a local DNS that keeps an up-to-date list of all domains where the ads, tracking or anything in that category of nuisances come from. If any of your devices request anything from one of the domains on that list, Pi-Hole simply resolves it to 0.0.0.0. Voila, it means that ad in your browser is not loaded, saving you some traffic, but also more importantly, mental health.
As you can see in the image, 20% of our domestic DNS traffic would otherwise be spent on ads, but is now simply blocked.
There are some gotchas in the setup process, though. Once you have it running, that Raspberry running Pi-hole will be a custom DNS server in your network, but your devices won't be using it by default. Your router is still the one assigning which DNS servers the clients are going to use, and it won't know to use this one automatically.
So you have two choices. First - manually configure all the devices on your network to use this DNS instead. This works, but is not ideal.
The better approach is to make your Pi-hole the main DHCP server of the network. This means it will be the one handing out the network configuration settings to all connected devices, and yes, this includes telling them which DNS server to use. This is currently done by your main, ISP-provider router, so we need to change it so it's instead done by this Raspberry Pi running Pi-hole. Then any device that connects to your network will use this ad-blocking DNS, automatically.
This has the exact same gotchas as having two DHCP-enabled routers on the network - they can clash. So to make it work, you need to disable DHCP on your main router and only enable it on your Pi-hole device. This works fine without needing to set anything on your client devices, because unlike DNS, DHCP server is broadcasted across the network, so devices know how to find it.
There is one more gotcha. On my Android phone, ad-blocking just didn't work in Chrome. Turns out, Chrome is overriding your DNS servers and using its own. Hidden under a "Privacy & Security" screen is a setting "Use secure DNS" which does this. Disable it.
While the setup is pretty easy once you take the above into account, and once done works smoothly, it's pretty hard to test it at first. This is because DNS results are cached on multiple places (OS, browser, somewhere else?). So even though you just set a Pi-hole as your DNS, the results might still be coming from a DNS cache somewhere and you may not actually be using it for real. And it's really cumbersome to find all places which do DNS caching and specific ways to purge each of them.
I found the best way to test it is:
Luckily, Pi-hole web dashboard is good enough that you'd be able to see each DNS request that comes in and if it resolves to a real domain or not. It even shows it grouped per device, so you can check if it works by inspecting the data for that specific device.
Yes, DNS traffic is generally NOT ENCRYPTED; keep that in mind next time you use a public WiFi somewhere - your network admin can see your device and which domains you're requesting. But if you're a good guy, Pi-Hole allows you to at least anonymize these things, so your network admin (you) can't see those things. You could even set up DNS-Over-HTTPS to encrypt that traffic, but as of this point, I still haven't.
Next on, there are limits to what this DNS-based approach can do. If some website serves both its legit contents and its ads from the same domain, then tough luck, Pi-hole can't do anything. Luckily, most of the websites still serve ads through external systems, so this will work on them. But not all websites are like that, so you still need an ad-blocker in your browser too.
Some players are actively fighting in this war against war against ads, most notably Google. So no, this doesn't work on Youtube. I'd guess they have entire teams working on making sure their ads show regardless of what you throw at them, which may include completely novel technology like splicing ads into videos in real-time.
Apart from Pi-hole, I'm also hosting Nodemation (a self-hosted Zapier alternative) and one of the four instances of this blog (red one). I had grander plans in my original blog post about it, but I realized I mostly don't need any of it.
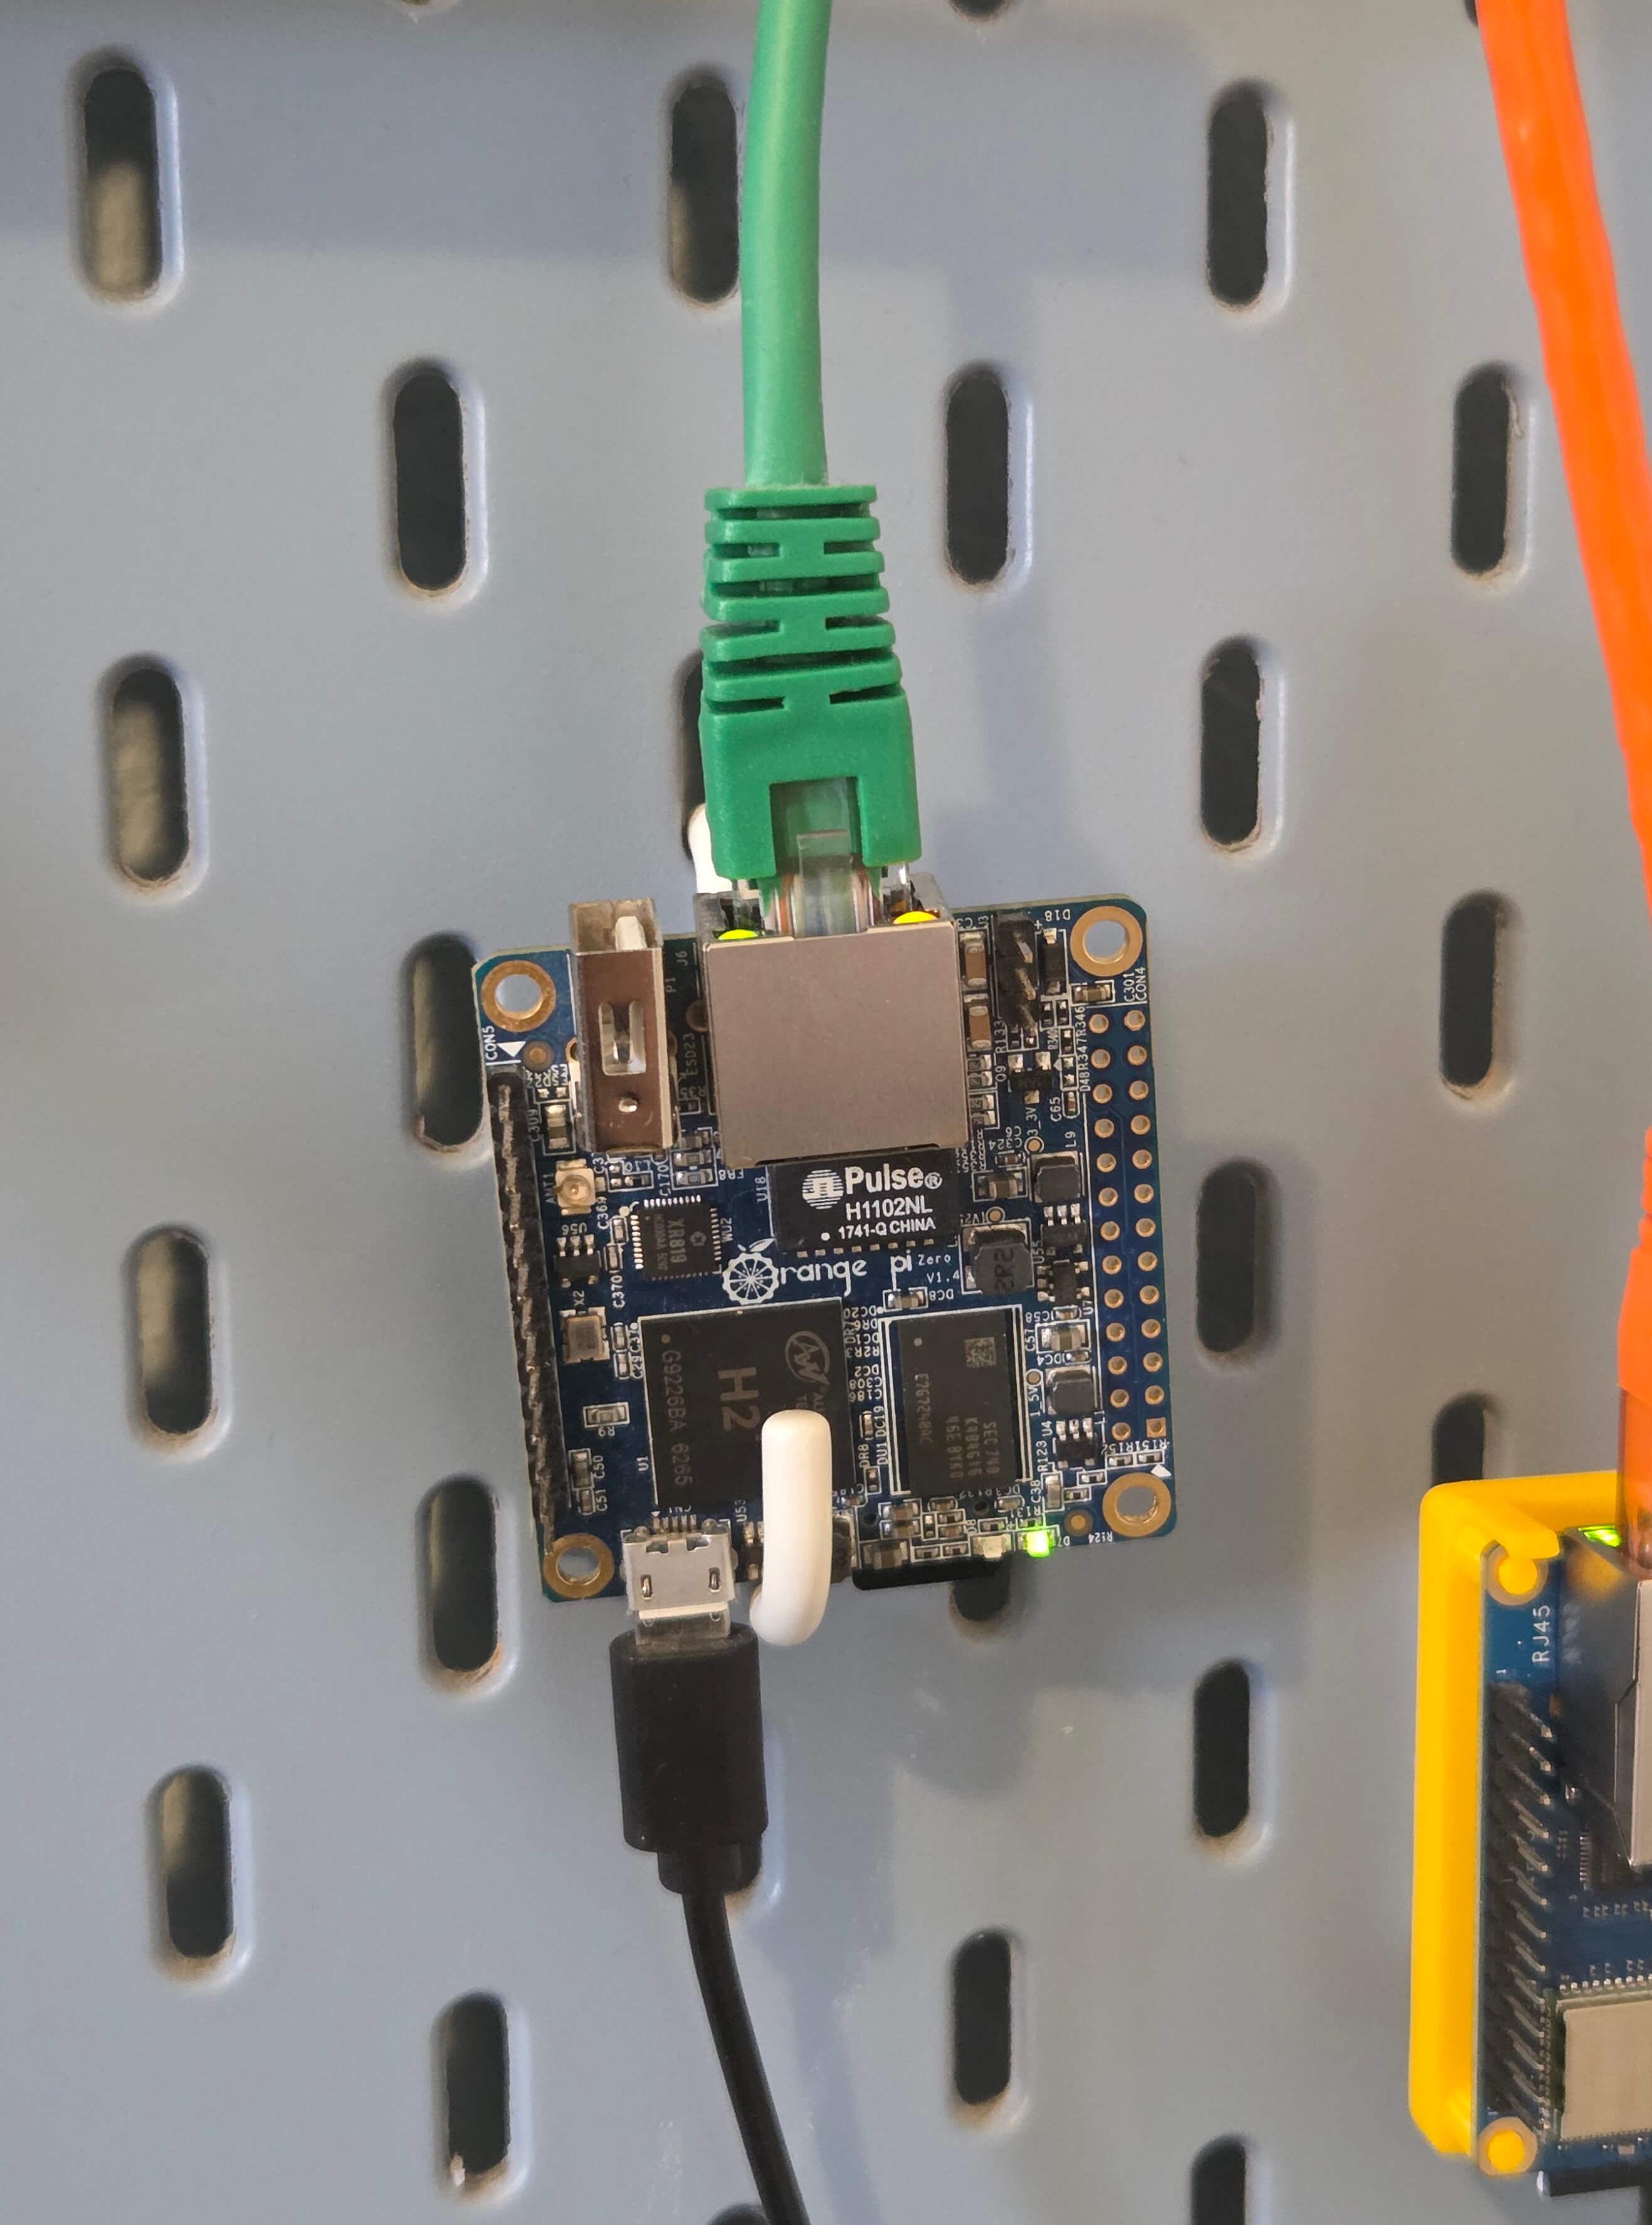
Orange Pi Zero 3 - The Media Machine
Next on, we have an Orange Pi. I bought this one on a whim while ranting how Raspberry is fussy about some things, only to discover Orange is fussy too, just about different things. But it wouldn't be fair to complain much - I really like this one and would say it's my favourite of the bunch.
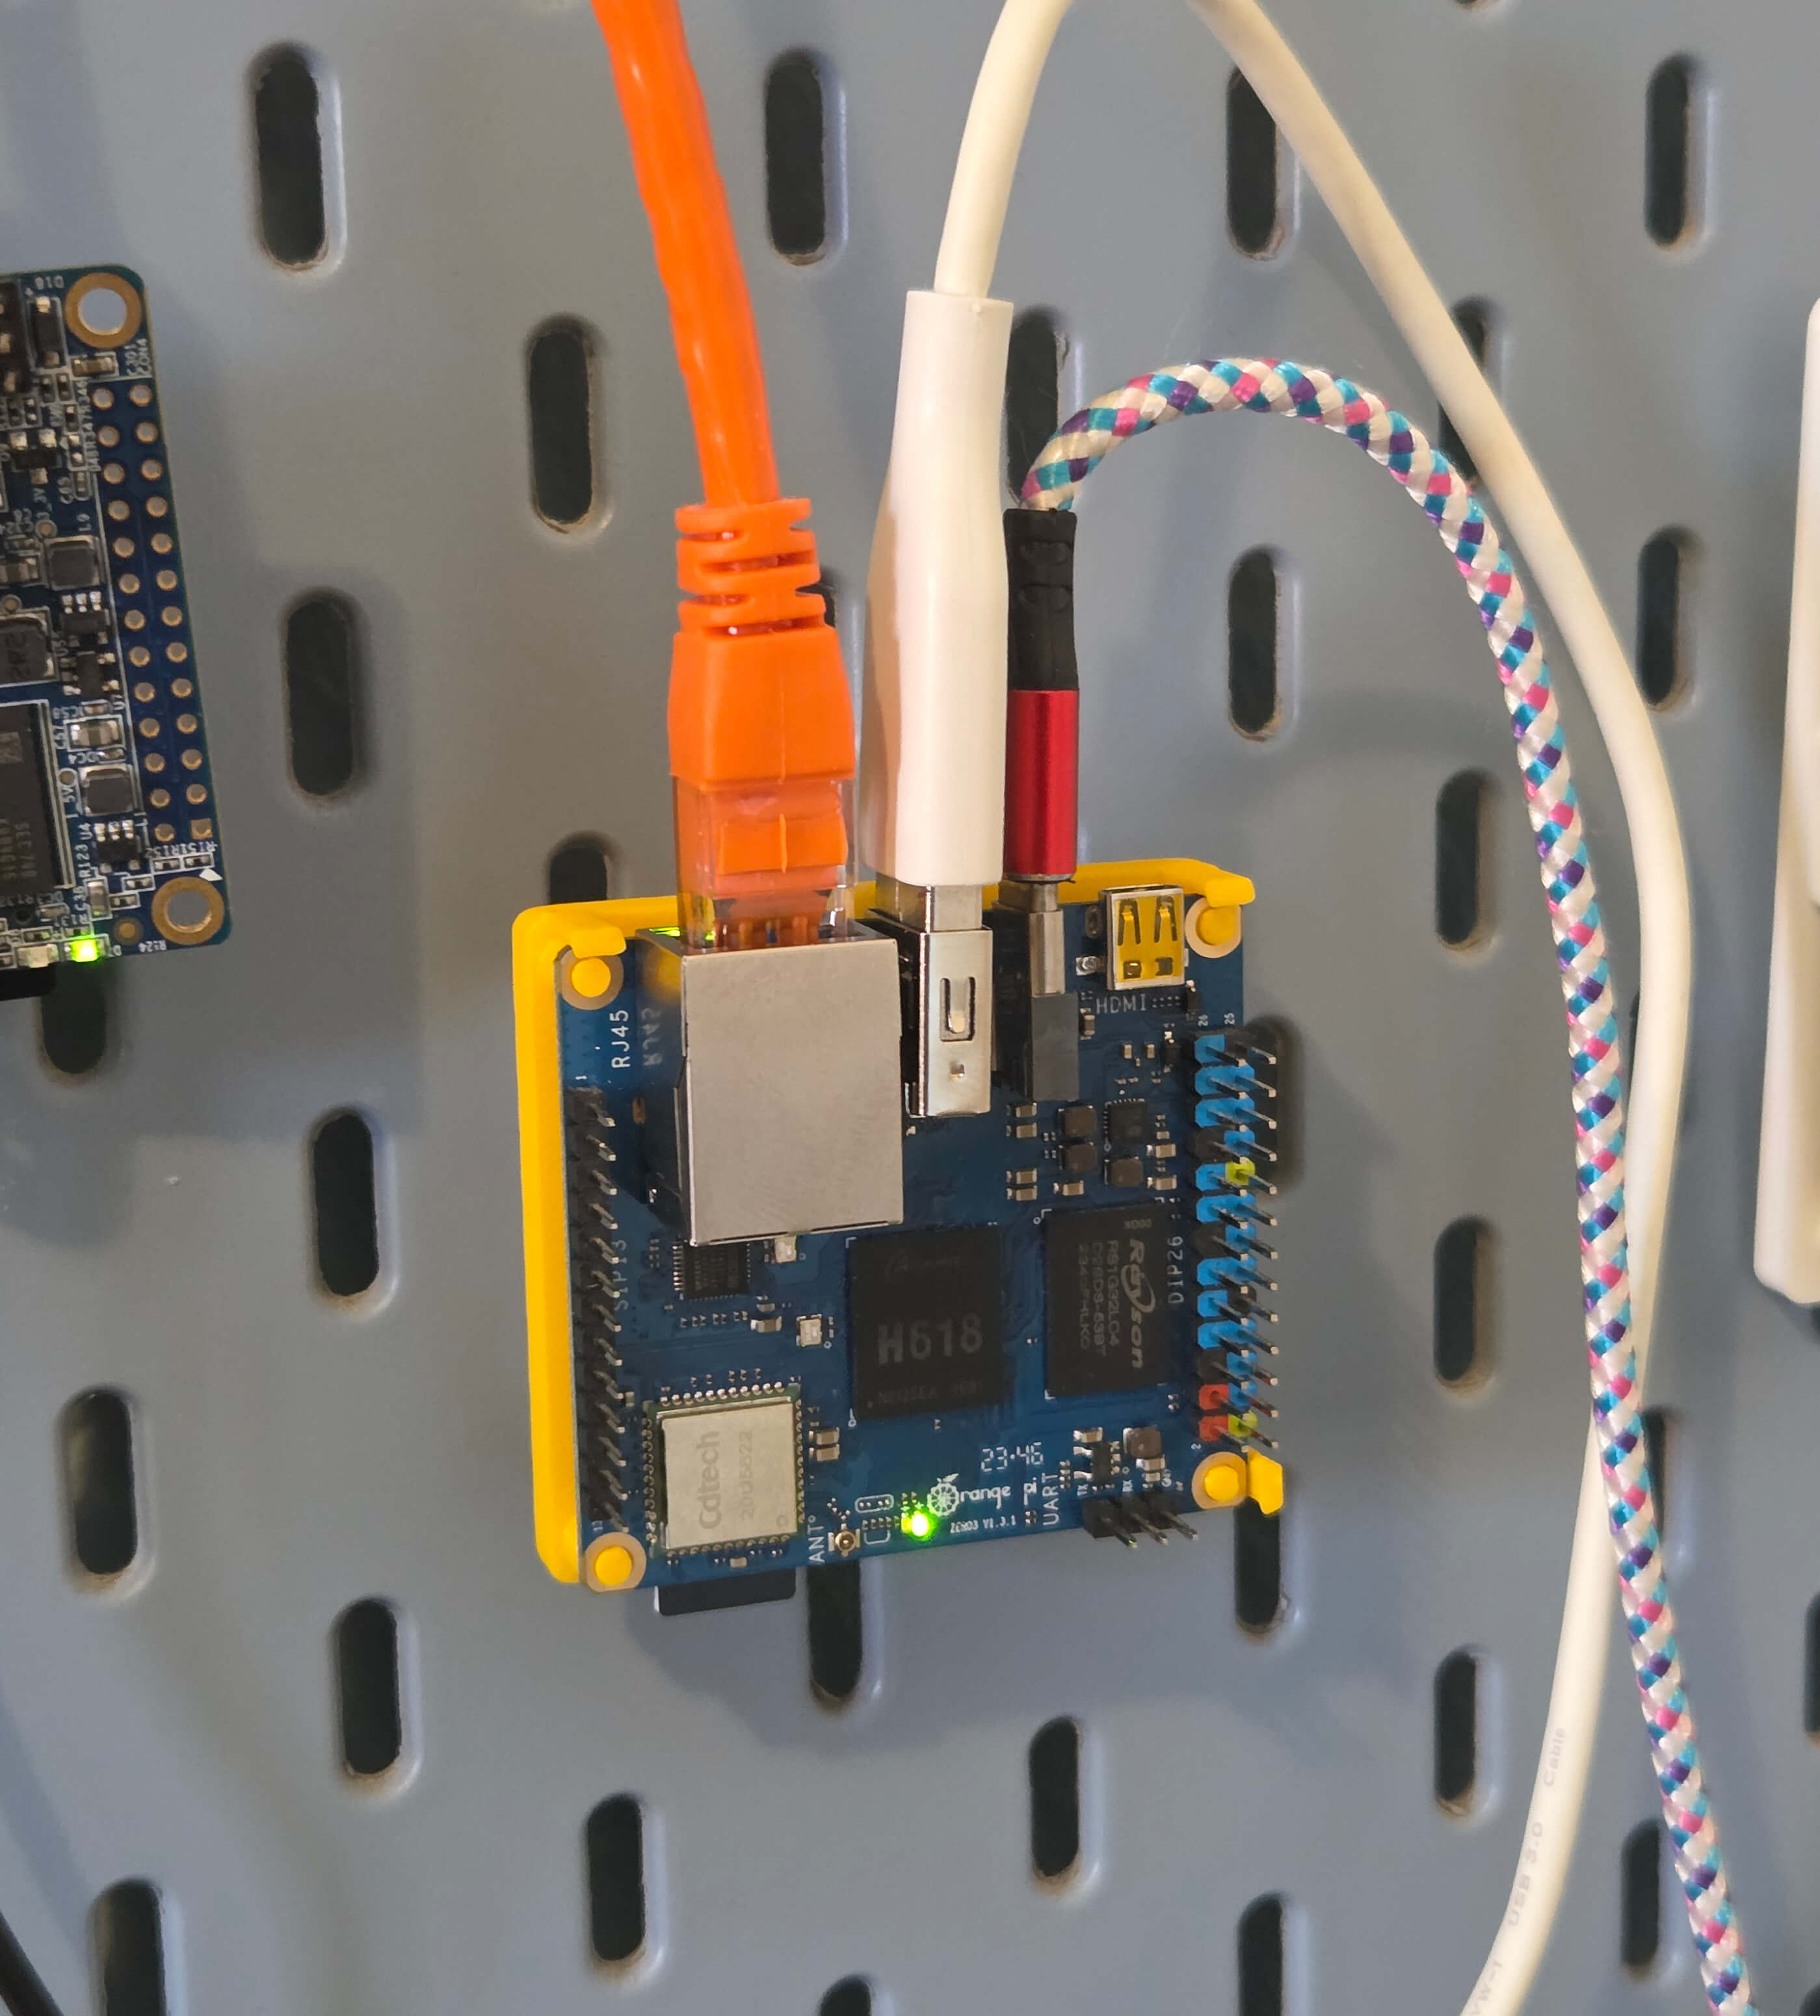
The orange ethernet cable means this one is hosting an orange version of this blog. The white cable, however, goes to its external storage. Keeping with the makeshift, low-budget theme, it's a five-year-old mechanical hard drive, so definitely not something that anyone should rely on in 2025. But somehow it's still spinning.

It's there because I originally planned to make a NAS out of this, but quickly realized I have no use case for that. But the big hard drive there did serve another purpose.
After losing half of my readers talking about routers, and then a half of that talking about DNS, this is now a safe space to admit I'm back to piracy. Just like Steam has shown us ten years ago that people will buy things if it's more convenient than pirating them, so have the Netflix/Disney/Amazon shown us now that people will pirate things if it's more convenient than buying them.
I could but won't go into moral rationalizations how piracy might not even be that bad. I'll just say that, in the current media ecosystem, torrenting stuff offers better UX than paying for 1-3 separate subscriptions.
It has happened to me too many times that the one thing I wanted to watch is currently available exactly on that one streaming service that I'm not subscribed to. I would gladly pay 2-3 bucks to watch just that one thing in that case, but no, the only option you have is a monthly subscription.
Anyway, I replaced all of that with Jellyfin. If you've used Kodi or Plex, it's basically the same thing - a self-hosted media player. You pirate acquire the media you want, load it up on the drive, and then Jellyfin gives you a nice UI where you can stream it from. There are an apps for Android, iOS, smart TVs, and it all supports simultaneous playback at the same time, so you can set it up and share credentials for your library with your friends and family.
It supports non-video media types as well, so you can use it as a music player (works great) and an ebook reader (does not). I tried replacing Spotify with this too, and surprisingly, it works well enough that I've also been Spotify-free for over a year now.
With all this, your workflow changes a bit, or I could even say it "gets timeshifted back a decade". You won't have all the music available on your fingertips and you'll have to maintain the music collection manually. As I don't explore new music as much as I did before, this turned out as not that big of an issue. If I want to listen to something specific, I do have to download it first, which can be a challenge if it's something less known. Here I realized that unlike video streamers, Spotify/Deezer are Actually Good, because each of them has everything. But I'll stick to this cheapskate thing for now.
Jellyfin UI/UX are not as polished as Netflix/Amazon/Disney's are, but that's the price you pay. Since this is all open source, there are alternative frontends for it you wanted to tinker. For example, I don't watch movies from my phone, but I do listen to music, so I'm using the Fintunes which offers much more streamlined experience for music.
I have used Plex for the same purpose before, but always found it finicky, to the point that I just stopped using it. It couldn't find the server instance, even though it was always on the same IP address. It couldn't find the movie that I'm pretty sure I had just put on the disk and clicked the "Sync Library" button many different times. There were playback issues.
So after that, I didn't expect Jellyfin to work any better and to consistently keep using it, yet it's exactly what has happened. Docker-based setup and deployment is very simple, its uptime and availability are great, and performance-wise, even this small Orange Pi is enough to run it and even offer simultaneous playback on multiple devices.
Still, it's not all roses and sunshine. Finding and managing the video files and subtitles takes some fiddling. Sometimes the files themselves can be corrupted. Some features that you take for granted on Youtube can here bring the entire server down. For example, a few nights ago, I was connected to WiFi tethered from my phone and lowered the streaming resolution a bit to save my bandwidth, but then the entire server broke down. Why? Well, obviously, because this means video has to be re-encoded in real time, which is simply too computationally expensive for this $50 dollar computer.
But while running and managing this is not exactly a walk in the park, overall it is a pretty good if you can invest the time in it. Most of the nights you'd be able to watch what you want, instead of staring at a terminal and saying "it will be just a minute" for thirty minutes straight while your family hates you for delaying their gratification.
(Inactive) Backup Pi-hole
Apart from all this piracy talk, this Orange Pi also hosts the orange version of this blog, and a secondary instance of Pi-Hole. Initial plan was to have two Pi-Holes on my network for redundancy. I knew all network settings have "primary DNS" and "secondary DNS" fields in them, but it turned out it doesn't mean what I think it does. It's not a "main" and "failover", but instead it will always use both in a round-robin fashion. Which means we're back to that original issue of having two DHCP servers on a same network, which is a recipe for catastrophe.
Of course, there are ways to set it up if you want, but I'm wary of implementing solutions that I can't remember or explain. So currently, this instance of Pi-Hole is not active, which means there's only one running on that Raspberry Pi and that it is a single-point of failure. Anything happens to it, the internet is down. So if I really have to do something on it, I first have to re-enable DHCP on my main ISP-provided router to keep the internet working. This sometimes works.
The 3D Printing Adventures
The thing that is instrumental in holding the entire thing together, physically, is the IKEA Skadis pegboard. It's pretty cool because it has a variety of different hooks/mounts/cables, so you can really put a bunch of different things on it, and even make it look good. I originally saw this on Herman Õunapuu's blog and immediately wanted to do it myself.
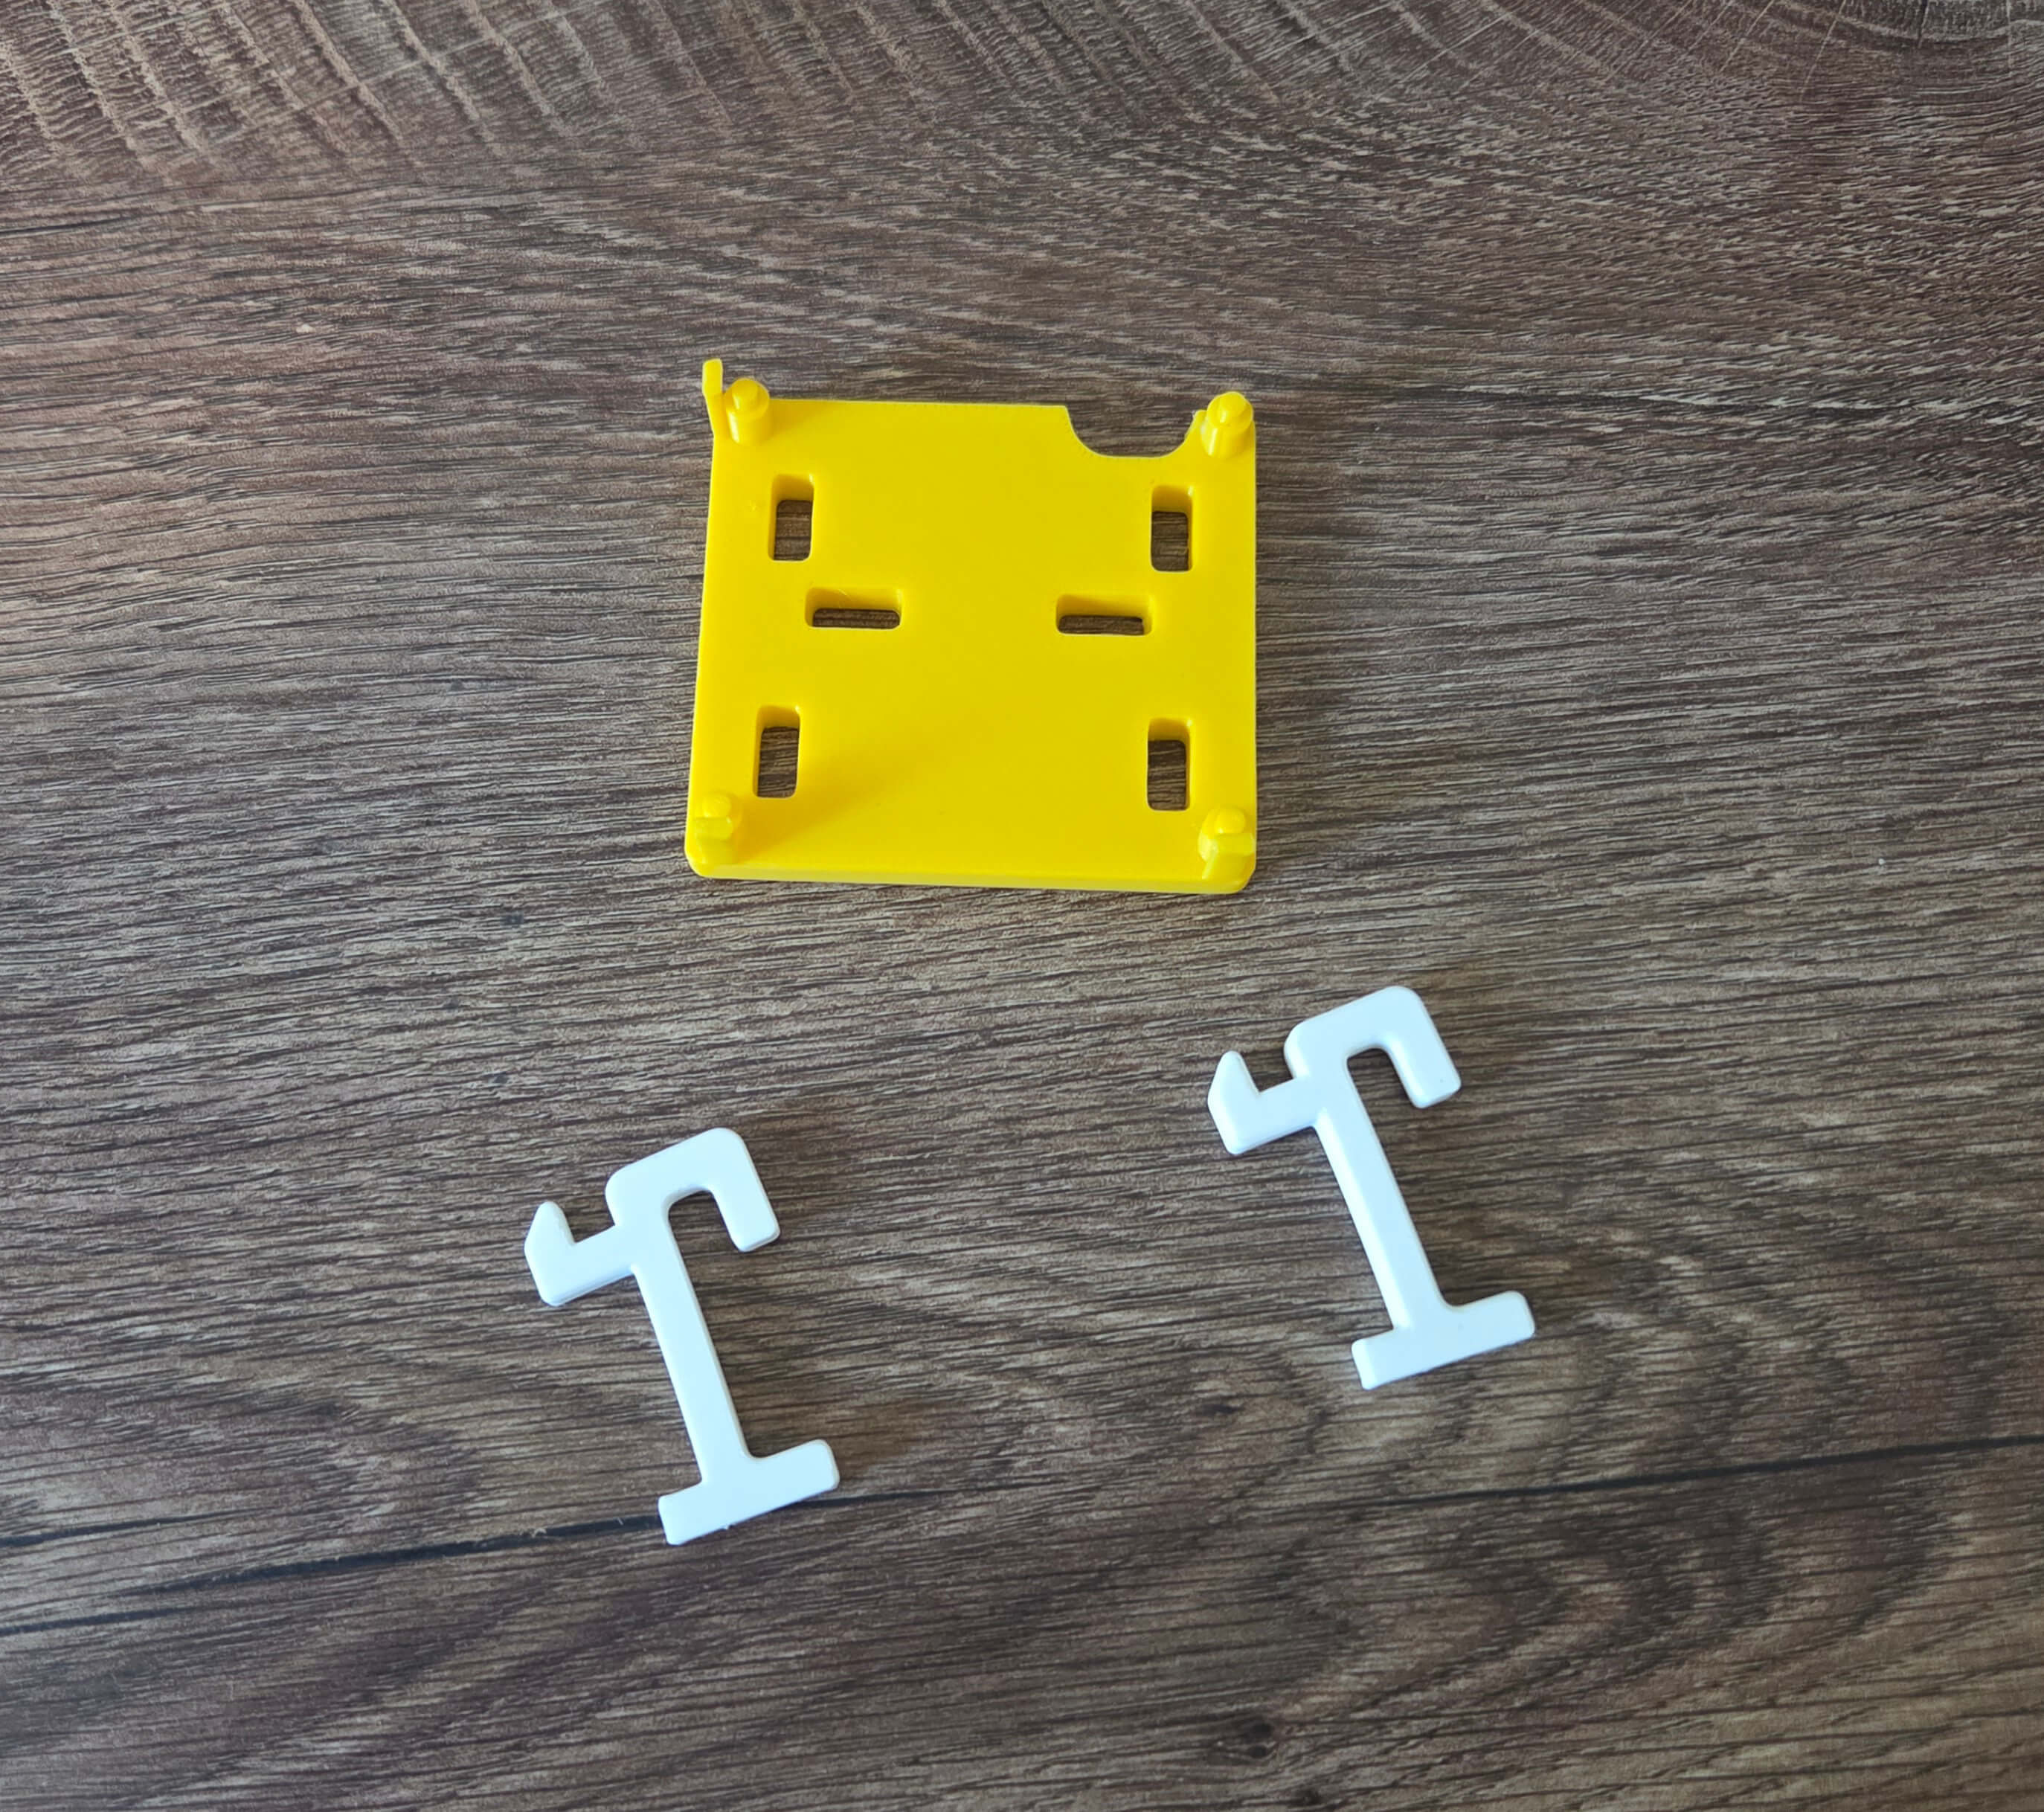
It has, however, driven me a bit into a completely new rabbit hole that I didn't expect, and that is 3D printing. It turns out that the 3D printing community likes this board so much that people have invented a whole new system of mounts you can use with it, along with a bunch of accessories you can connect to it. I had these printed at separate times so they're of different colors, but the white part is something you stick on the board, and the yellow part is a housing for the computer, that you then just stick to the board.
For the Raspberry, I went to Physibles or Thingiverse, searched for "IKEA Raspberry" and found the mount people have made for it. I asked a friend with a 3D printer and the next day I had it in physical form, ready to be put on the board.
For the Orange Pi though, which, as noted in my previous blog post, is not exactly a paragon of Good Support, I couldn't find the same thing, so I tried designing it myself. I used TinkerCad, which is a program simple enough that kids learn it in primary schools, but even that was enough to make what I needed.
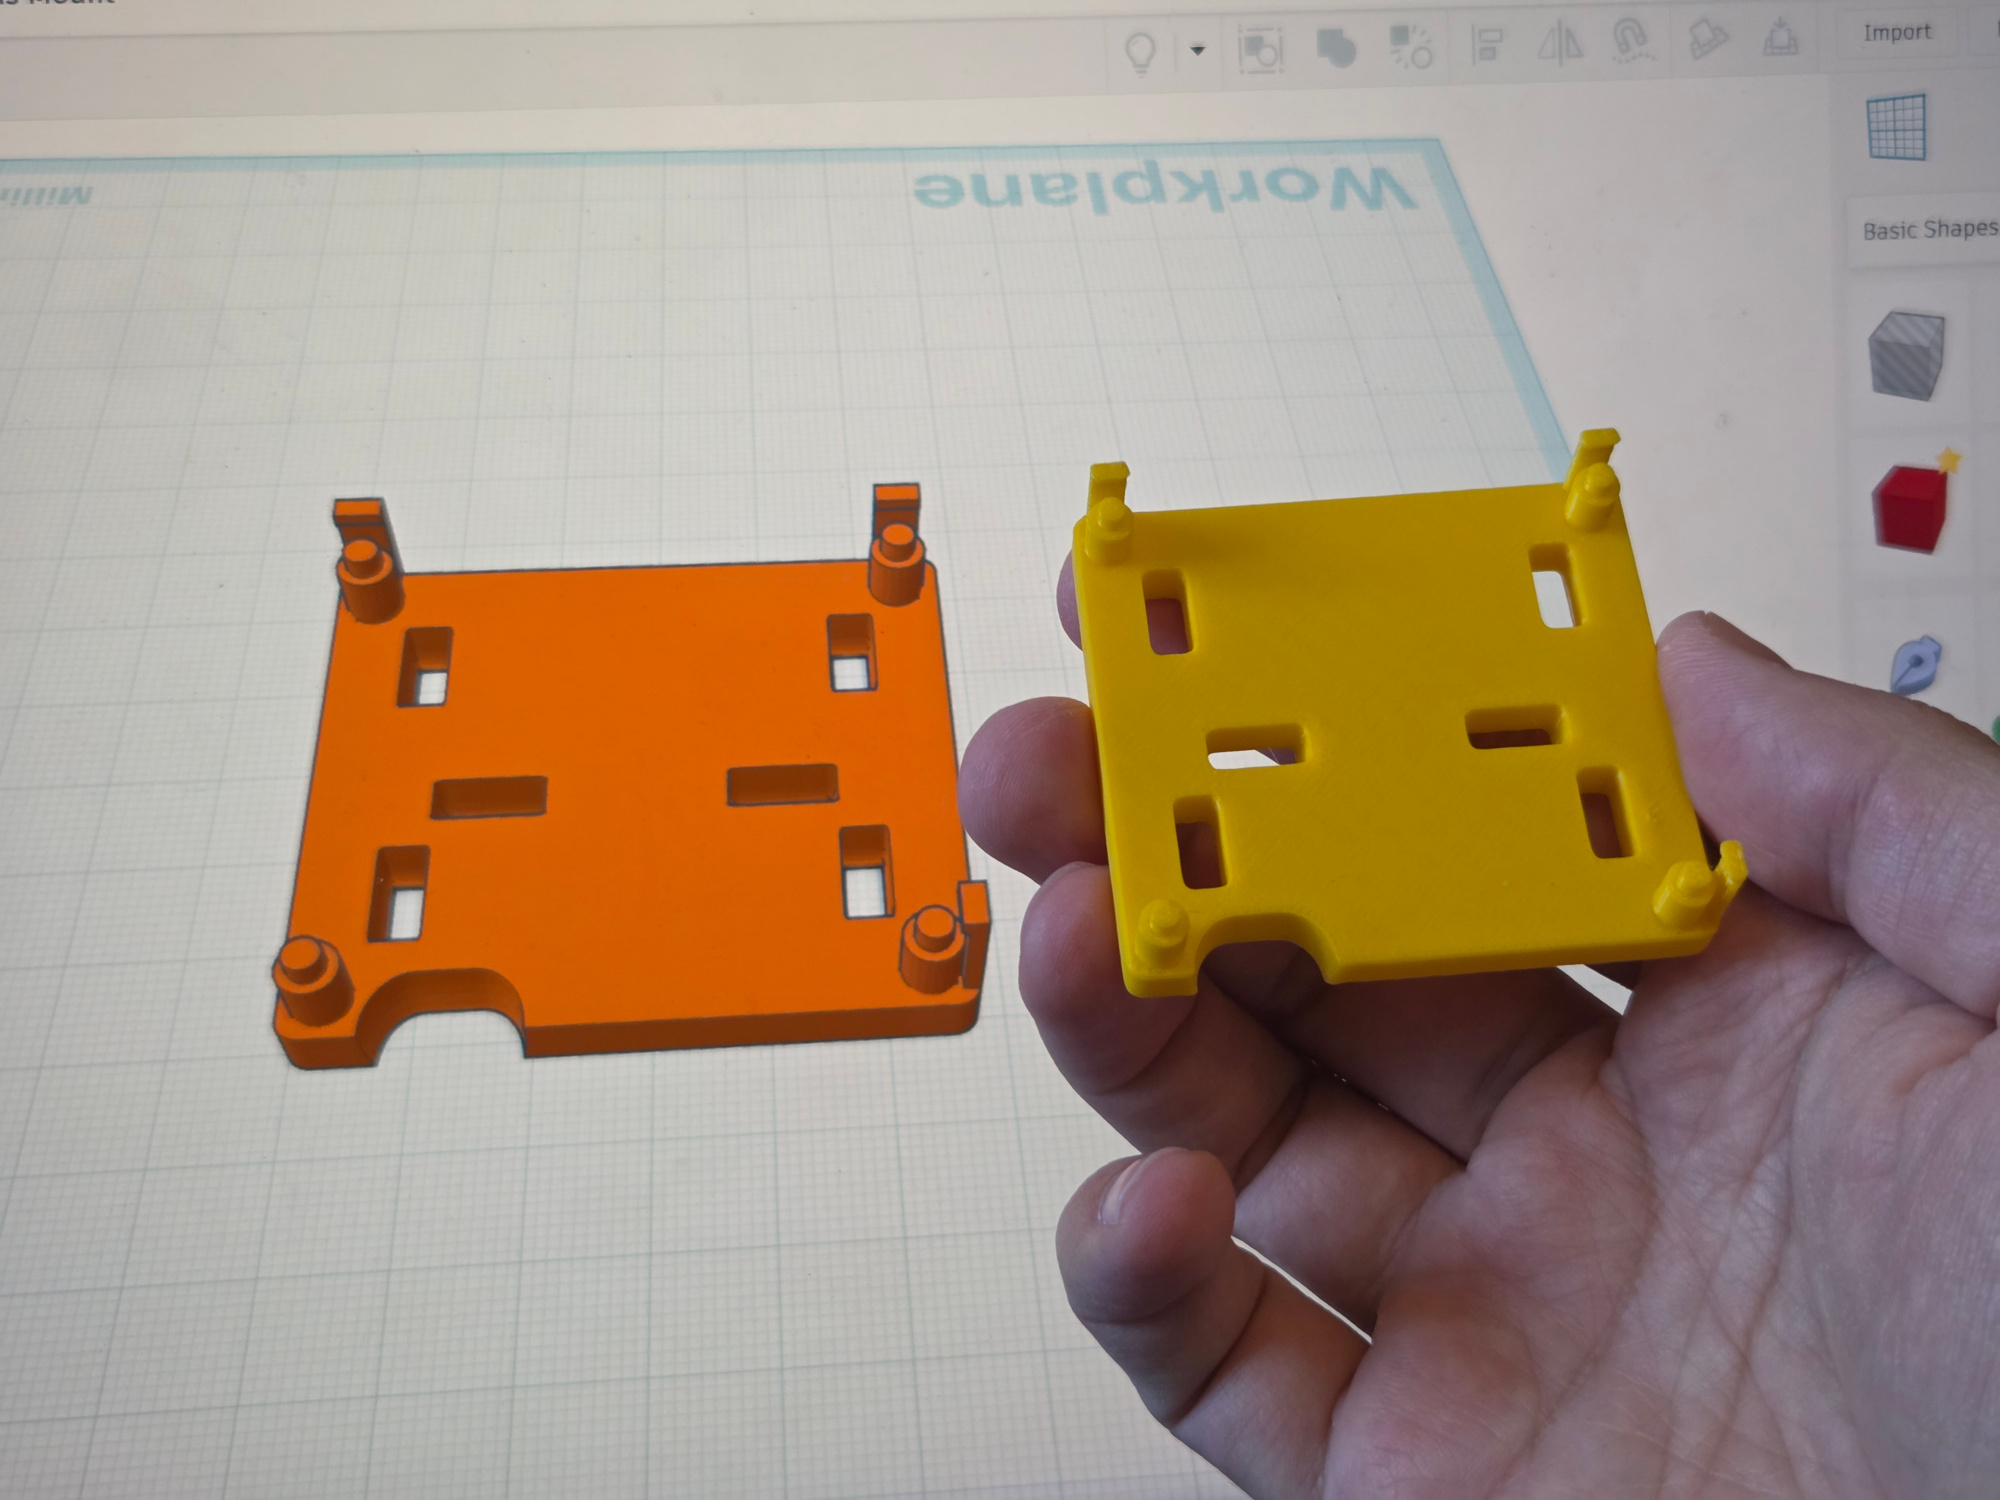
The moment when I sent it to a printer, which then started turning the drawings from a program into a real physical object in front of me was nothing short of mind blowing; and I've heard many other people having the same epiphany when seeing their first 3D print being rendered to life.
The video above is NOT sped up, it's really that fast - this mount was printed in 20 minutes straight.
The entire thing was also mind-blowing in a sense that 3D printing is not about printing itself, but rather that it unlocks the hobby of physical product design, where you can now easily create your own accessories, like holders for your phone, kitchen, cables, whatever; and have it in your hands shortly after.
After my first 3D print, I spent the next few days drawing in Tinkercad, frantically. One of these days, maybe I'll convert this homelab from wall-mounted to a custom 3D printed mini rack, or something like that. The opportunities are limitless.
Anyway, to give something back, if you also have Orange Pi Zero 3 and want to IKEA mount it, you can download my model for it here.
Orange Pi Zero 1 - Green Version Of The Blog
The last piece is the original device that started this entire adventure. The "green" Orange Pi from the solarhosting article, hosting a green version of this blog:
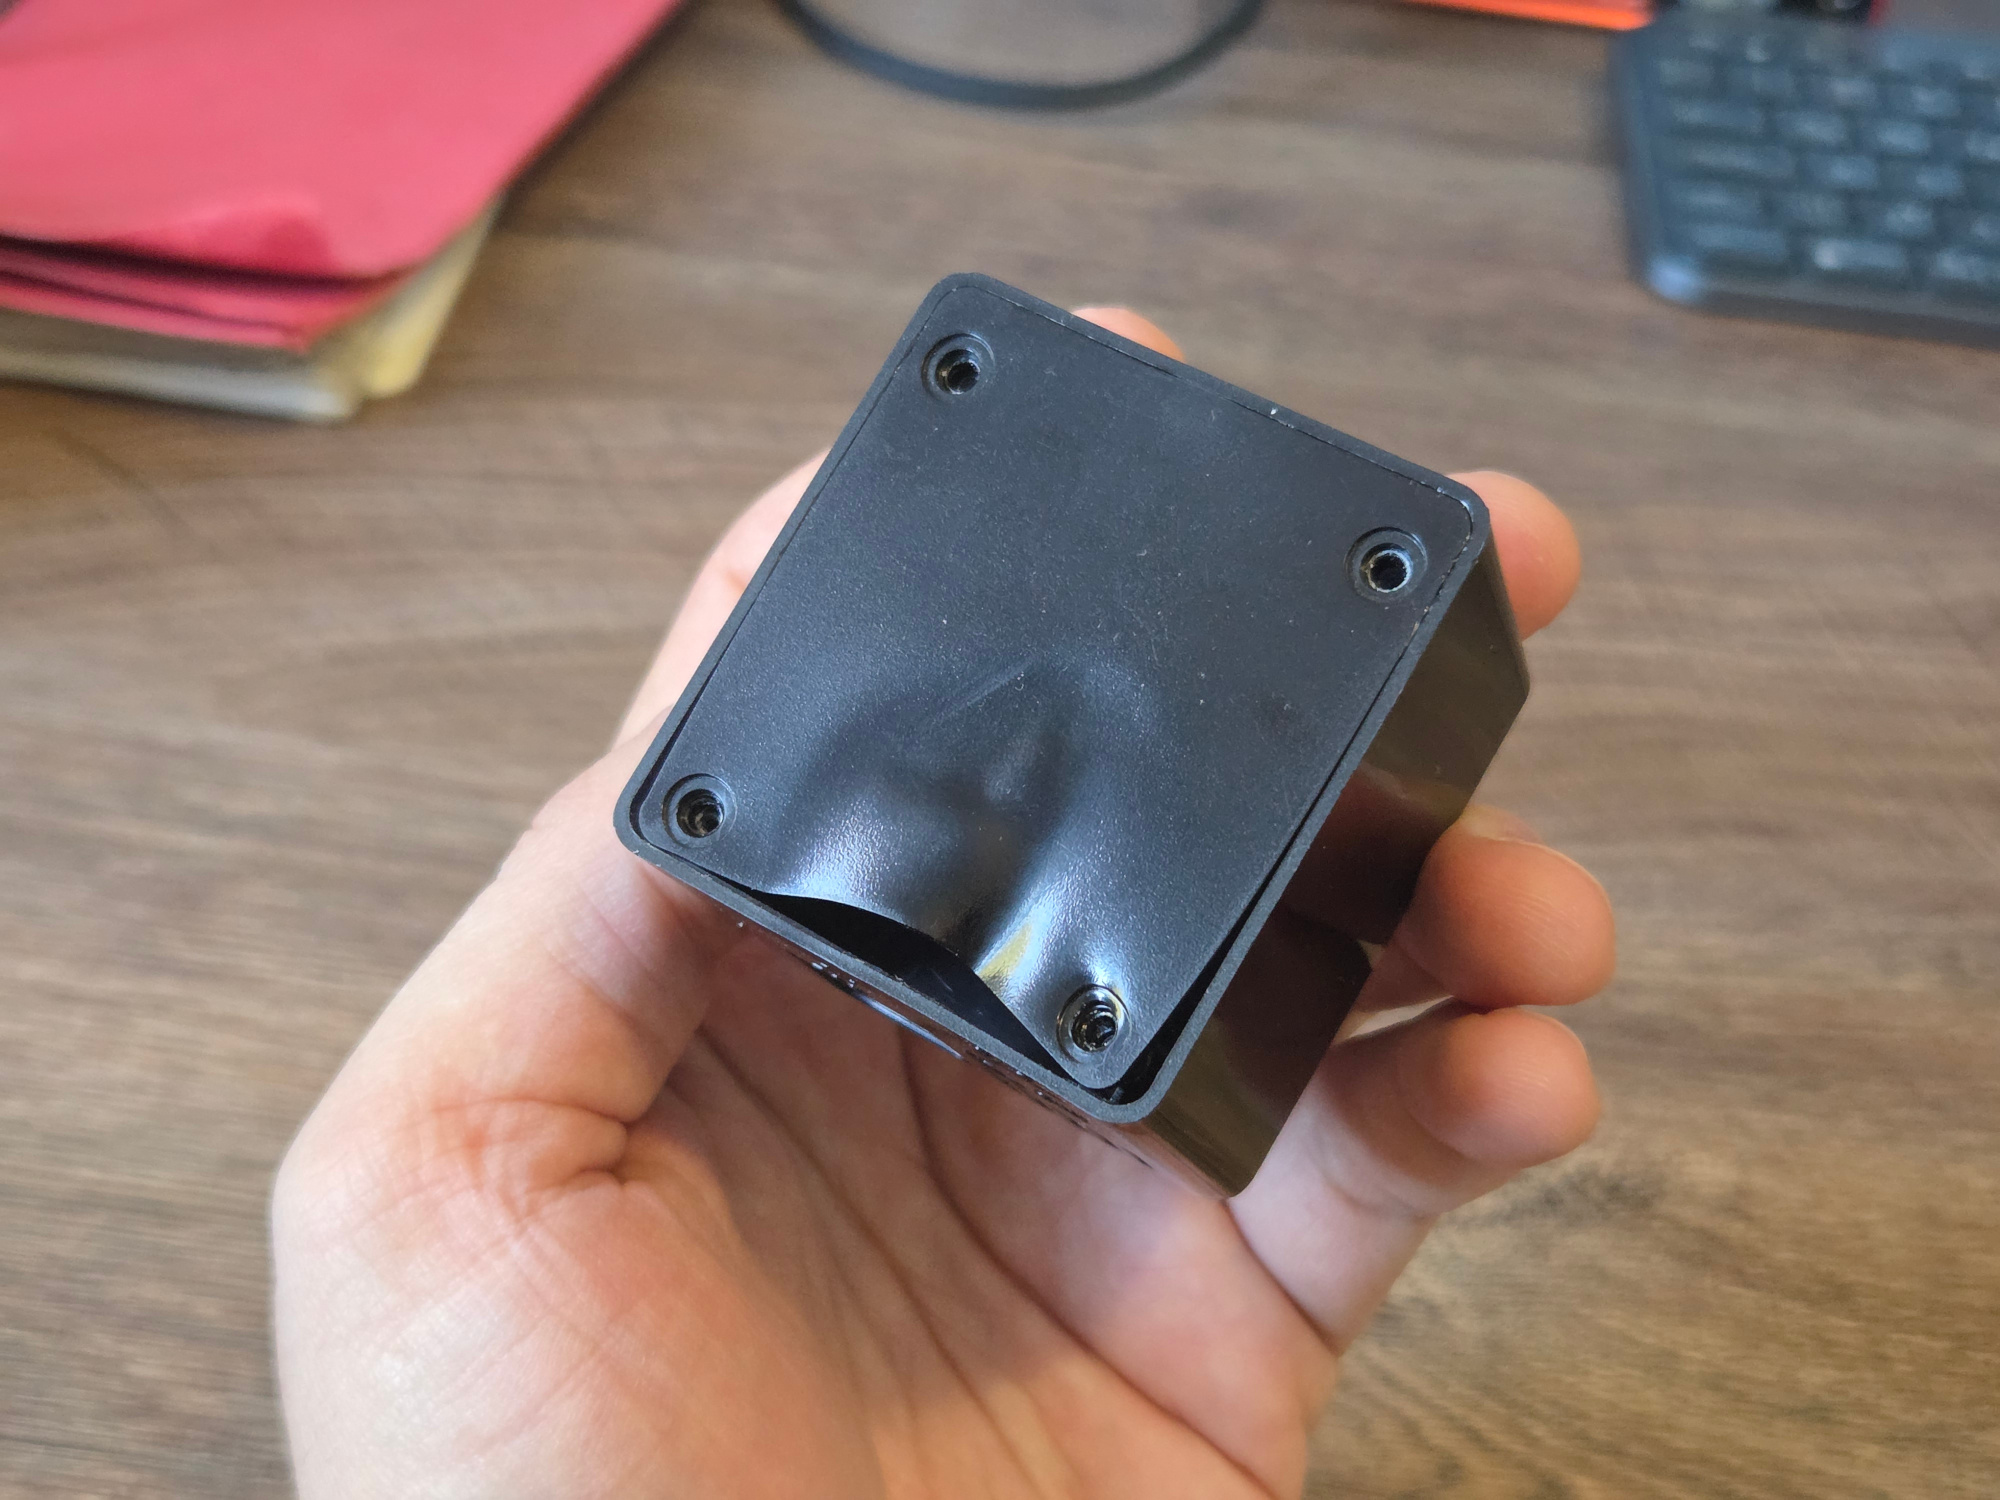
There's not much more to say about this one. Maybe only that for a while, it kept shutting down, and upon inspection I noticed that it has melted the piece of plastic housing it was part of. No idea how it happened, but after removing the case it's been working smoothly ever since.
Also note that I don't have anything 3D printed for it, it's basically just hanging from its Ethernet cable, just only slightly propped up from below by this IKEA hook. Try doing THAT with a full-size server.
The Invisible Parts
So how is it all connected? The entry point is a domain, mbrizic.com, which is managed on Digital Ocean. There, I have a very small VPS ($5 per month) that you land on first. From it, you either get served a blue version of this blog, or you get into some load balancing logic that sends you to my home instead, to one of these three computers in it.
At home, I don't have a static IP address, so I can't route you directly there. That's why I'm using DDNS instead. Sorry for one more acronym - this one means "Dynamic DNS" and is a kind of workaround to be able to host stuff from a changing IP address. With this, your devices simply update its DNS records all the time, so it always points to the IP address that's they currently have. I'm using Noip for this, whom I'm not sure that I'd actually recommend, but it does work acceptable enough.
This won't work if you're behind a CGNAT. This yet another acronym means your public IP address is not actually yours, but is shared by multiple households as a kind of IP-address-saving measure by your ISP. One time, I was debugging why my blog stopped working, and it turned out my ISP has, overnight, indeed put me behind a CGNAT! You can recognize this if your public IP starts with 100.x.x.x, which is not actually a public IP address, but a subnet hidden behind a real one.
This was resolved suprisingly quickly - a WhatsApp message to my ISP (yes, not even a call) asking to turn it off, which they did in an hour. I didn't even need to restart my router(s). Pro tip: if they ask you why you need it, please don't say that you want to host a website from home. Just lie and say you need it for security cameras, because that's more easily understood and common use case for this.
Anyway, when your request reaches my house, the router dispatches it to correct computer based on which port the load balancer sent it through. And voila, you get this website from it!
How I'm Running It
I didn't use any new, fancy, complicated tech for this, but instead focused on basics. I used only tech that has been relevant for a while, and that should presumably remain that way for long enough, too. This means I don't get any of the cool tech for free, like redundancy, replication, or even backups.
My backups are currently done by taking an SD card out of each small computer and making an ISO out of it. It's a pretty dumb clone of the entire card, which means that 64 GB card produces a 64 GB ISO file, which lasts long and takes a lot of space. I also don't really do this regularly, or verify if the restore process actually restores correctly (I did have to do it once and it worked). Not your usual production-grade standards, but for a hobby project, it serves its purpose.
Here and there, things do stop working and I have to debug what is up. I would say that after enough of such incidents, I've upped my resiliency game to the point this is now stable enough. But I also know each new thing I install could bring completely novel types of breakages. It shows this entire setup is inherently unstable, and the only reason I have no issues with it is that I didn't apt-get anything in a while.
So while I do keep notes on how to restore or rebuild important parts if they fail, the most important runbook is - how to simply disconnect it all and make sure internet works fine without it.
Let's talk about maintenance. For a "hobby", I sure spent too many a night stuck in a ditch solving issues I did not understand. Because after all, here you ARE messing with your home network, which, for many, is a critical resource.
And even if you get it working pretty fine for 99.9% of the time, you'll very well remember those 0.01% when you really wanted to relax on a couch and watch a movie, but instead you went past midnight debugging why the internet doesn't work, which turns out it's due to a failing SD card, which during the process dies fully; and you don't have a replacement SD card to use, neither you have the backup of that card you could recover it from. But it's all a learning experience - today I have PiHole running on two servers, and in case my wife says "hey internet isn't working", I will only feel a lightweight, low-burning stress, because to fix I have to "just" turn the other server on.
This makes me really appreciate the work of system engineers. No one knows they exist while everything's running fine, but as soon as something breaks, all eyes are on them and it's expected to have it fixed yesterday.
So, I keep notes, and I keep a lot of them because honestly I don't know how someone would remember how all components are laid out here, even in a setup as simple as mine.
One other area where this simple hobby becomes a 200 IQ PhD, is that if you're load-balancing between several servers, you're technically in a "distributed computing" territory, and things get complicated there really fast. For example, if I wanted to extend my blog with something as simple as a view count or upvote button, I have to think in distributed way to figure out where exactly to store that data. So in a way, having a multi-setup like this one is hindering me from easily experimenting with it in other ways.
Overall
So overall, was this all worth it? In total, I spent around two years of my hobby wall-clock time on this, and learned A BUNCH about servers and networking. As far as learning is concerned, this was an invaluable experience. Sure, there are practical benefits to this (ad-blocking, self-hosted Jellyfin), but the main benefit is understanding and being comfortable deploying something like this on your own.
This homelab has also been a great conversation starter. I'd bring the people in, unplug the orange cable from the switch and show that the orange version of my blog has gotten removed from the rotation. I plug the cable back in, and after some time, I show them that the site has recovered and even the orange version loads fine.
However, this wasn't really a great "conversation continuer". I could yap about this setup for a while (which is indeed what I'm doing right now), but this matter is not as understandable or interesting to even the techiest of my friends. So it quickly became a one-sided talk, with maybe a quick politeness question and then we got back to "cool, let's go back to do... anything else". I know for sure that it's cool, but that was the extent of those conversations.
So what does the future hold for this setup? Over time, the pace of change has slowed down and I barely touched anything there in the last six months. I don't really have any plans for the future either. So in a way, I consider this project finished.
I'm not saying I'll dismantle it right away (although my kid is getting taller by the day and very soon he'll be able to do it regardless of if I wanted or not). But I do have an urge to simplify, to have less cables around and less ports open, so I can sleep better.
On the other hand, I also have the opposite urge to start a new setup, this time using more serious hardware. I'm thinking full-size servers in a rack, two of them for redundancy, running in a Proxmox cluster with isolated VMs, RAID X, automated backups, etc... Sounds like a very dumb and expensive idea, so I hope it doesn't win, but who knows.
For the end, I'll just put the picture up to see this setup again. I have nothing more to say about it, except to repeat myself and say - I just think this is very cool.
